The vSAN file service creates a share on vSAN so that clients can connect to a SMB or NFS share.
For a stretched cluster you need to create affinity rules for the preferred site and secondary site for the agents vms.
When doing the setup you will need a vsan agent per host so if you have a stretch cluster of 8 esxi hosts you will need 8 dns entries and ips
For example
vsan-fs001 – 10.0.0.180
vsan-fs002 – 10.0.0.181
vsan-fs003 – 10.0.0.182
vsan-fs004 – 10.0.0.183
vsan-fs005 – 10.0.0.184
vsan-fs006 – 10.0.0.185
vsan-fs007 – 10.0.0.186
vsan-fs008 – 10.0.0.187
You will also need to create a service account that have permissions to the OU for creating and deleting computer objects and you will need to create a new OU as well.
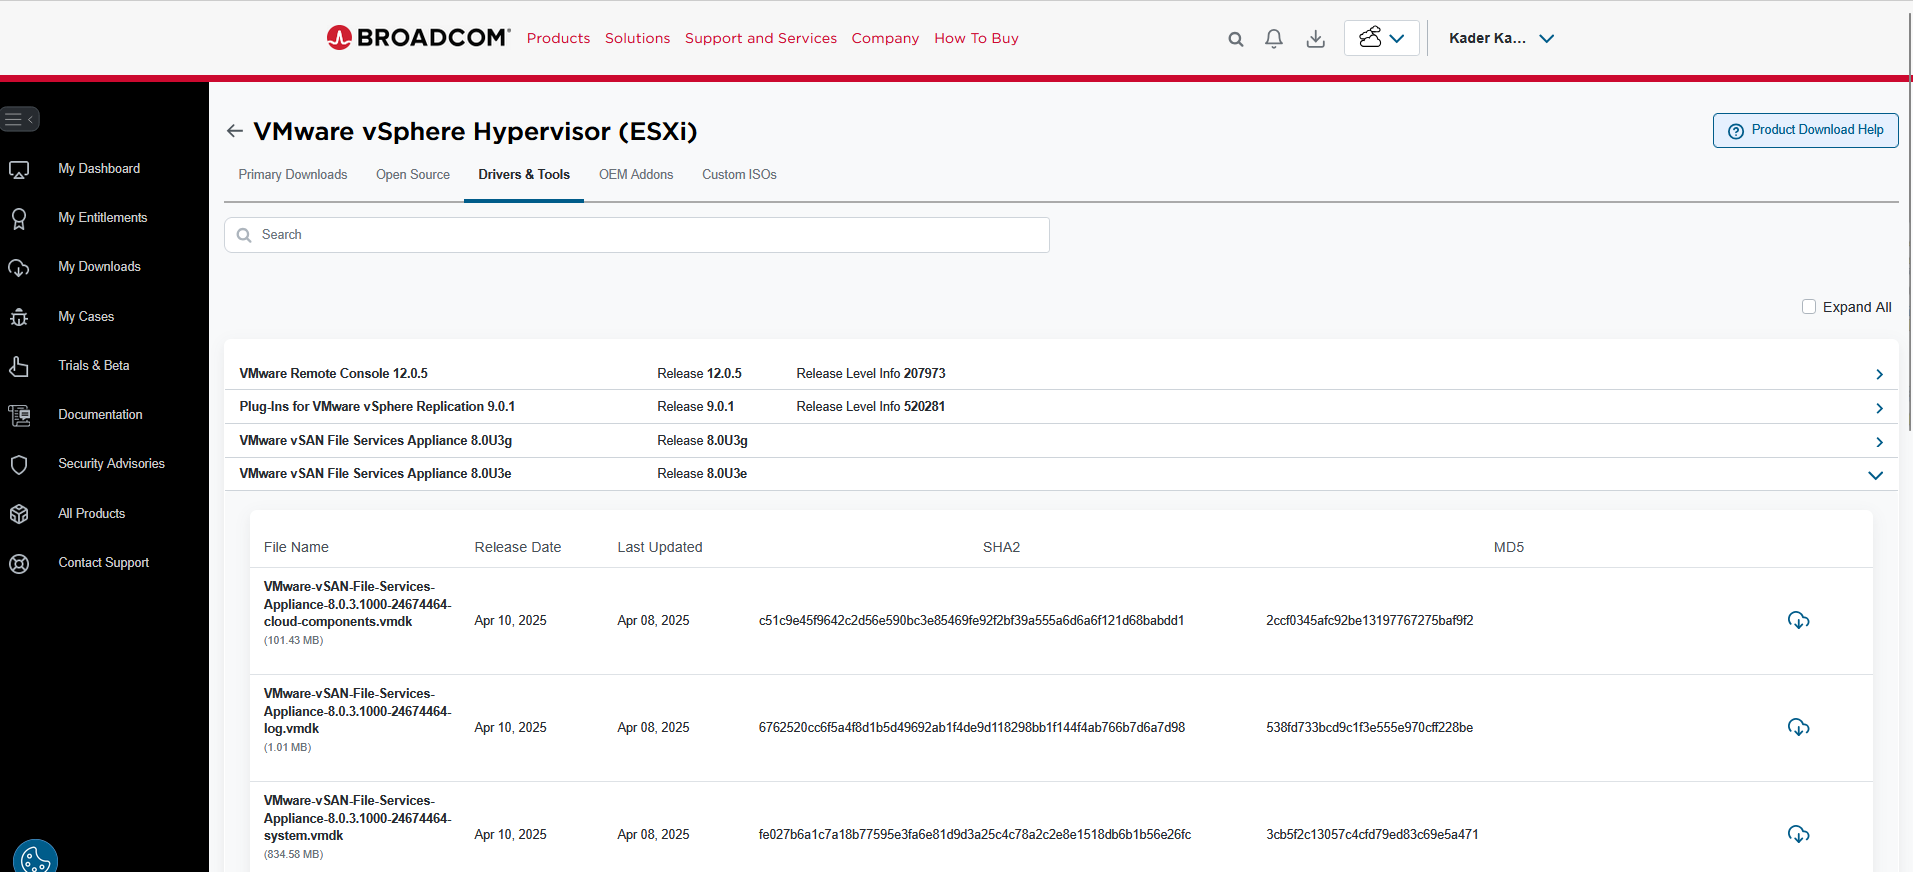
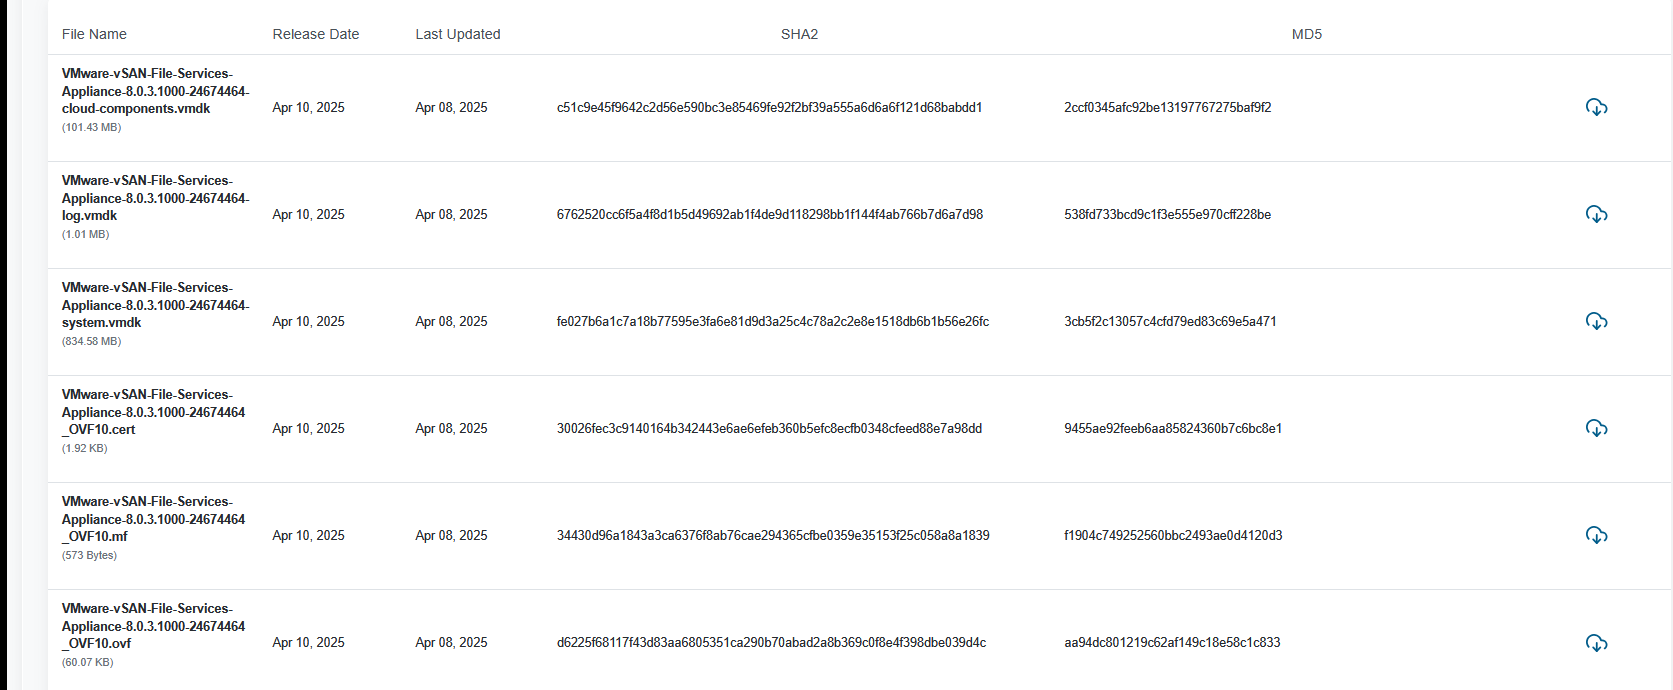
First you will need to download the 6 files from the Broadcom site make sure it matches your esxi version “VMware vSAN file services appliance”
Next create all your dns entries one for each esxi host
vsan-fs001
vsan-fs002

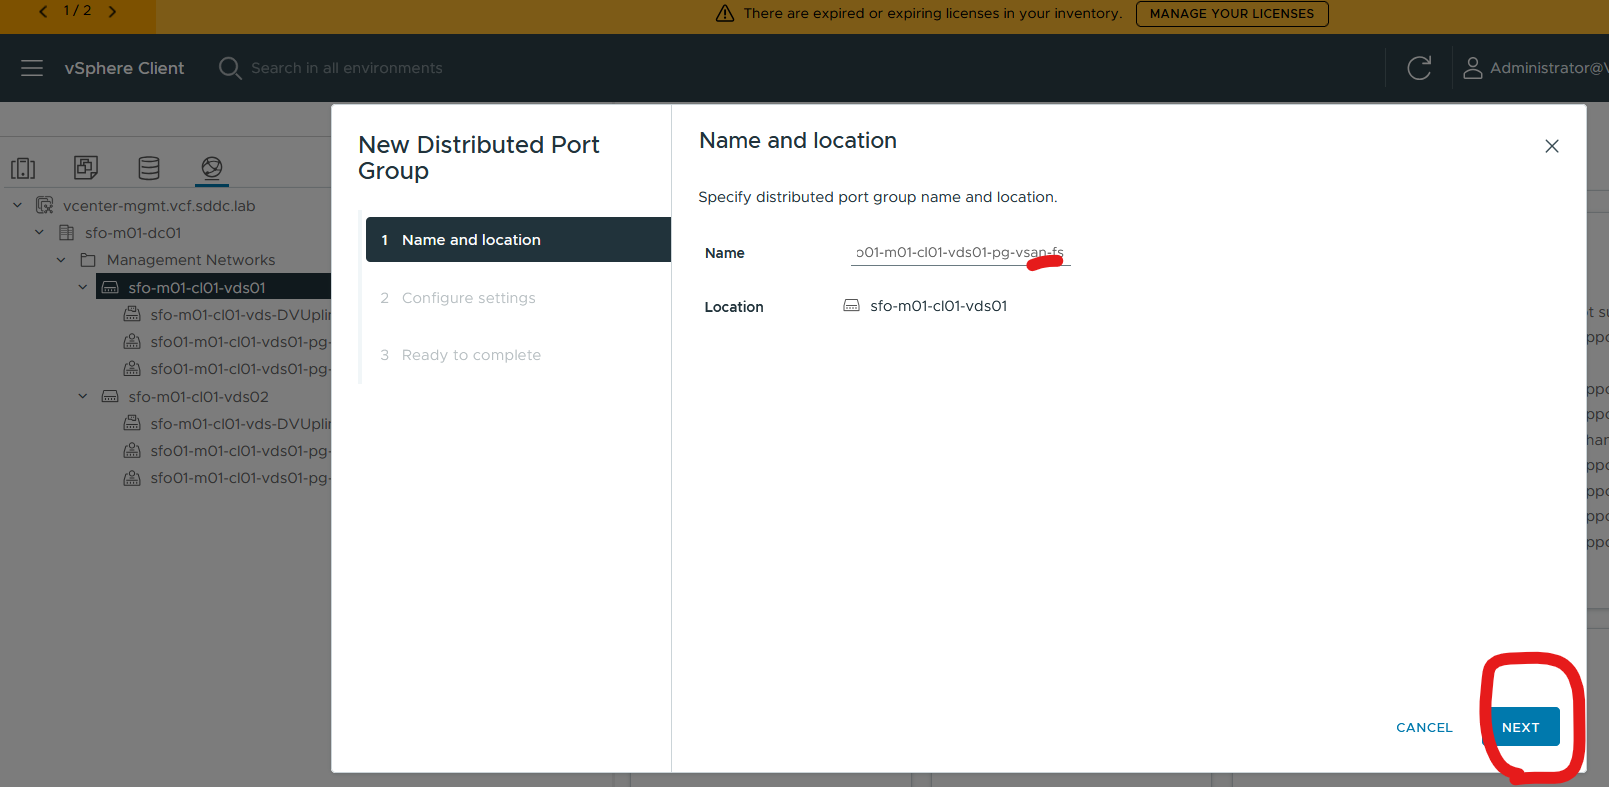
Next I will create a new port group using the same vlan as my management

Give it a proper naming convention something like vsanfs at the end
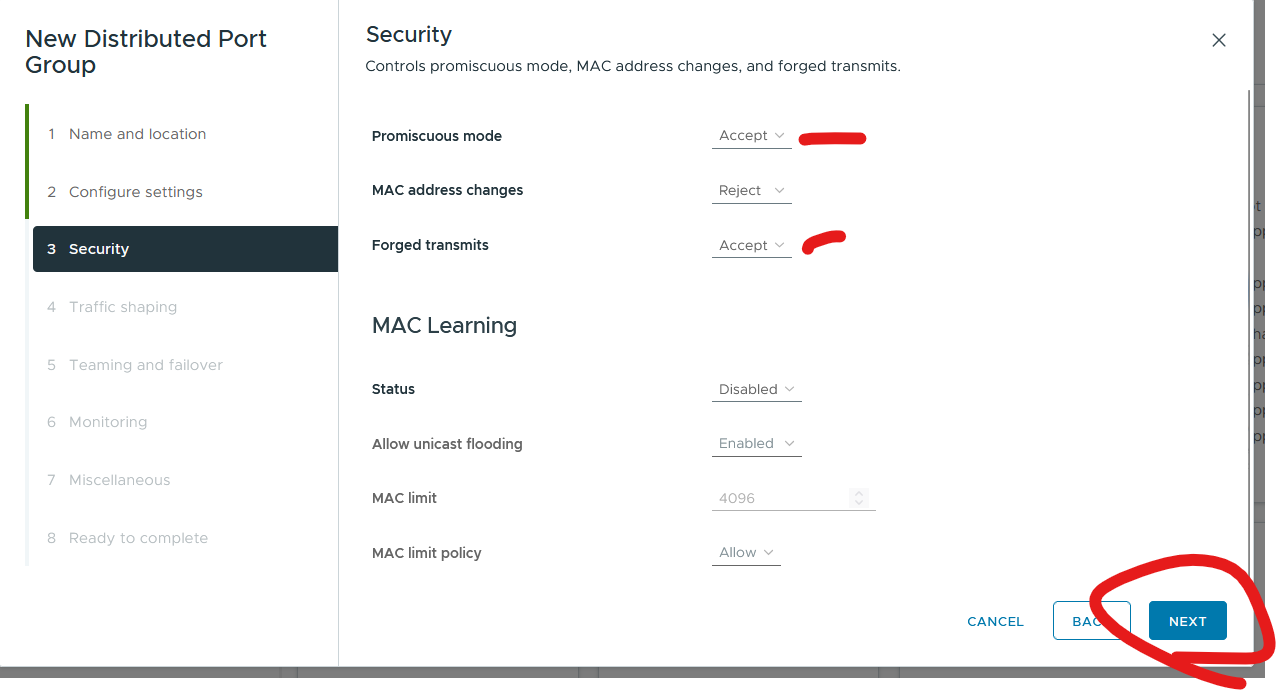
Assign a vlan and customize options

Promiscuous mode and forged transmits will need to be turned on and mac learning, this will get done automatically anyways
Use route based on physical nic load but ensure it matches the rest of your environment


Next enabled vsan file service at the cluster level
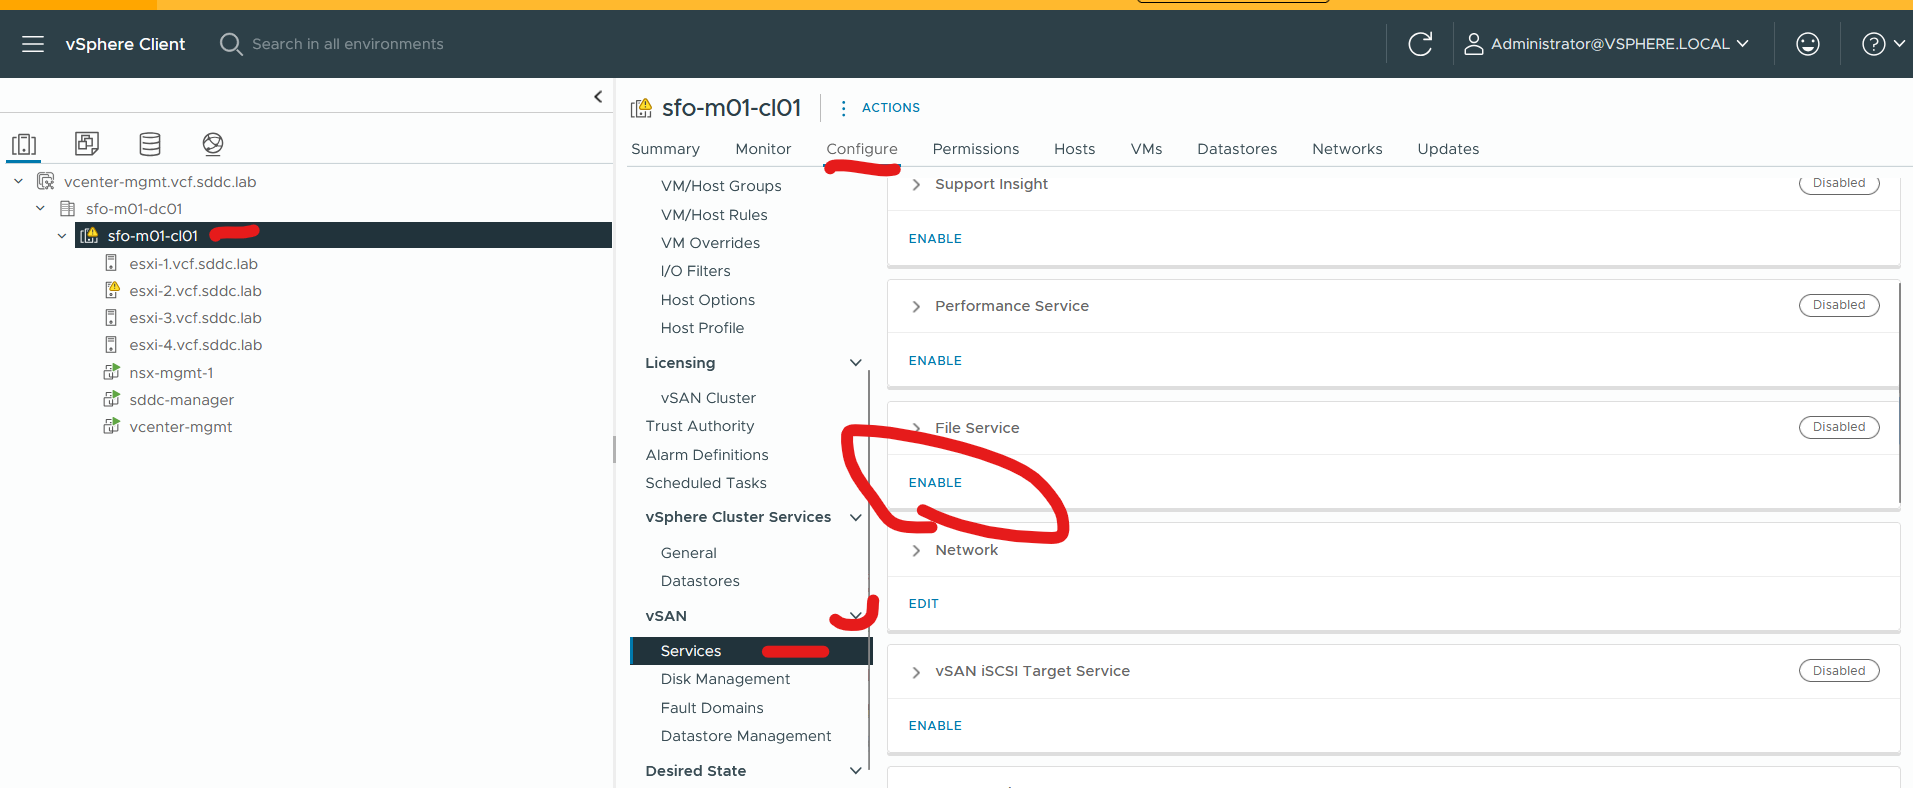
Select your port group you created and add the 6 files you downloaded earlier and click enable 


Next click configure domain

Give it a name (use your active directory domain name here “vcf.sddc.lab” for the file service domain)

Now put in your dns servers, dns suffixes, subnet mask, gateway and your vsan file server ips and dns remember if you have a stretched cluster it will show a little different here it will have ip pool for preferred and ip pool for secondary. I would setup half as preferred and other half as secondary for the affinity site, i wouldn’t leave as the either option or you can just do all as preferred
example for a stretched cluster
vsan-fs001 – 10.0.0.180 – preferred
vsan-fs002 – 10.0.0.181 – preferred
vsan-fs003 – 10.0.0.182 – preferred
vsan-fs004 – 10.0.0.183 – preferred
vsan-fs005 – 10.0.0.184 – secondary
vsan-fs006 – 10.0.0.185 – secondary
vsan-fs007 – 10.0.0.186 – secondary
vsan-fs008 – 10.0.0.187 – secondary

Next we will need to create a domain user with sufficient privileges to create and delete computer objects in the OU
New user vsan-fs-svc

New OU don’t put special characters in it otherwise it wont work.

Click view in Active directory and click advanced features > Right click the OU and go to properties > click the security tab > click add and add new service account

Select service account and click advanced

Find user in the list and select > Click edit
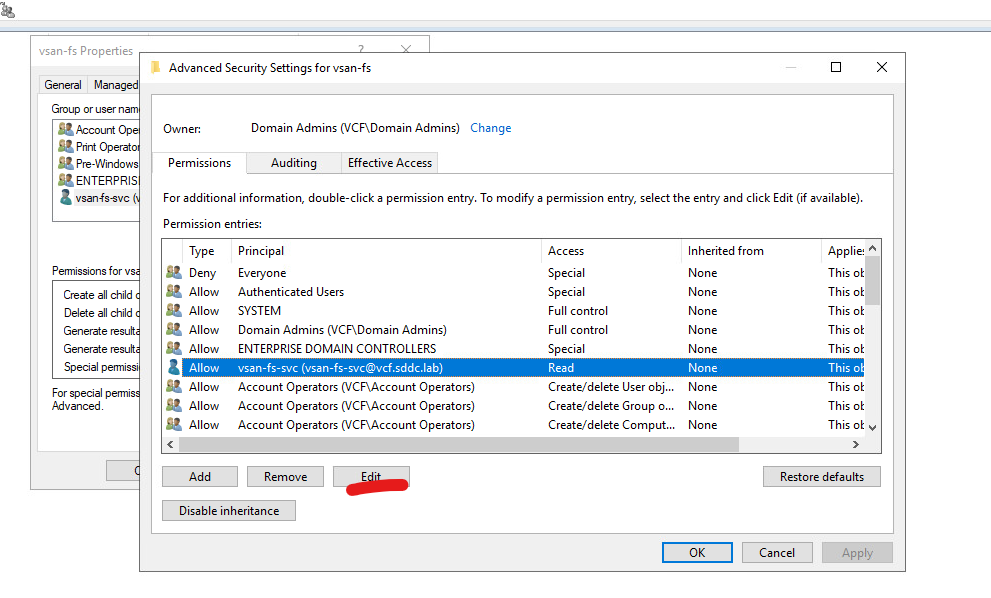
Select create computer objects and delete computer objects > click ok


Now go back to vCenter and continue setup
Select active directory, type in the domain, type in the location of the OU, type in the service account information and click next

Click finish (in my lab I am only setting up two file services)

A esx agent get created for each esxi host

The ou gets populated

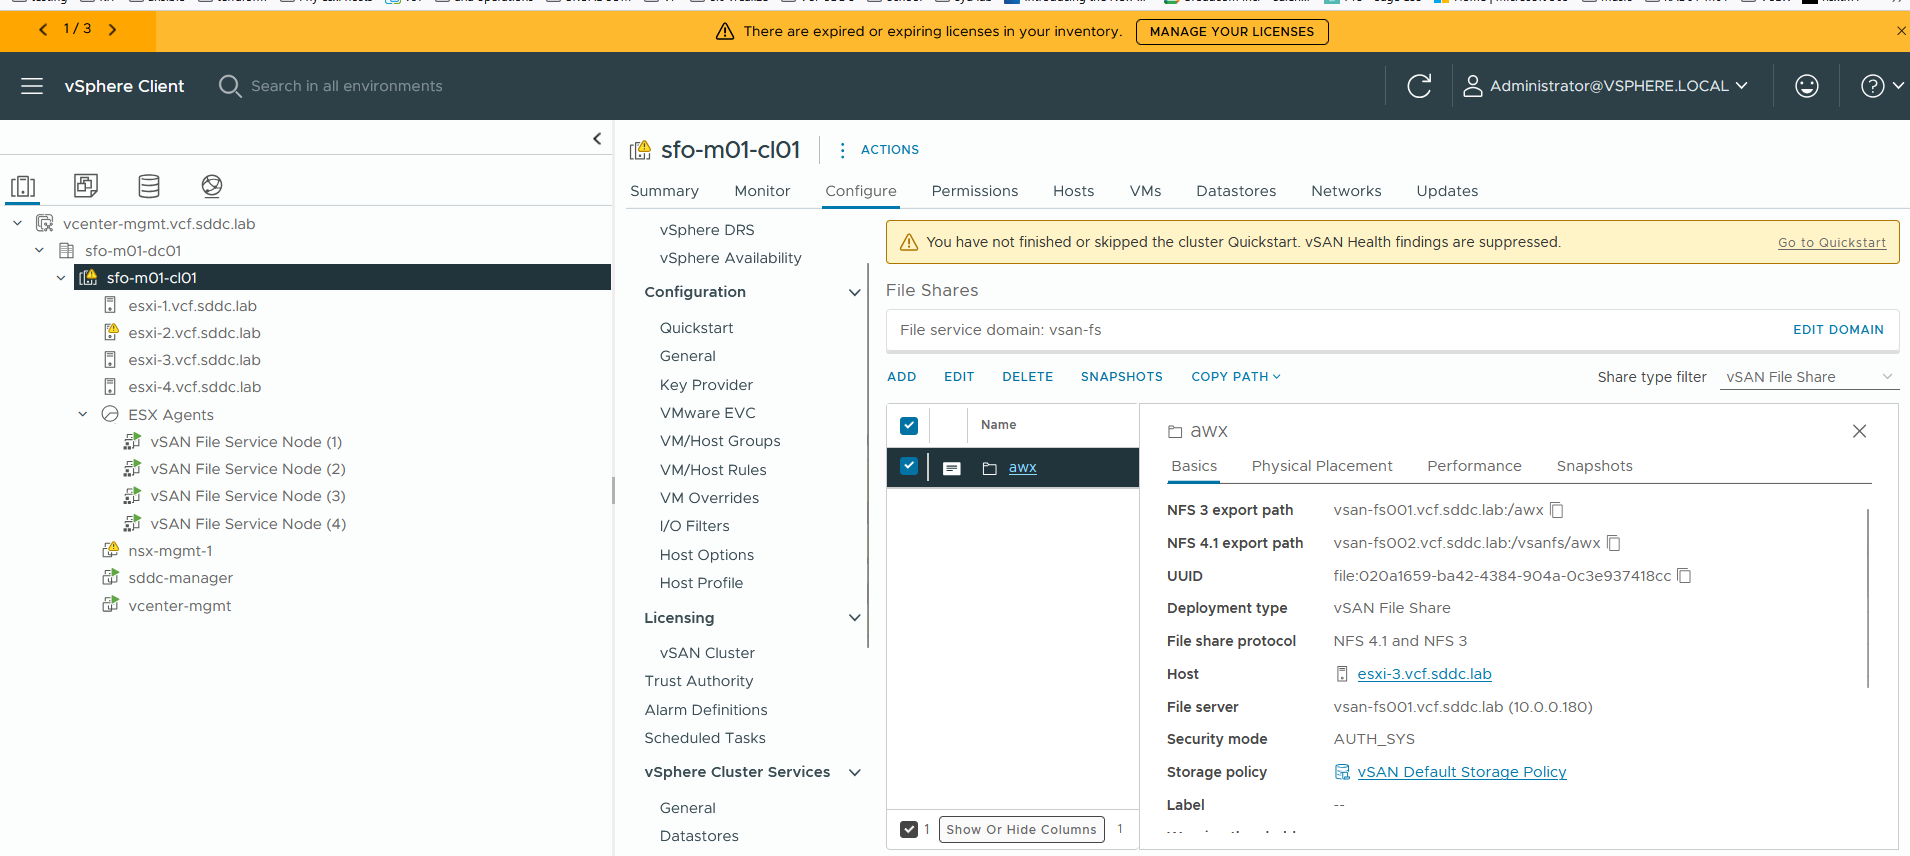
Now click on “go to file shares”

Click add
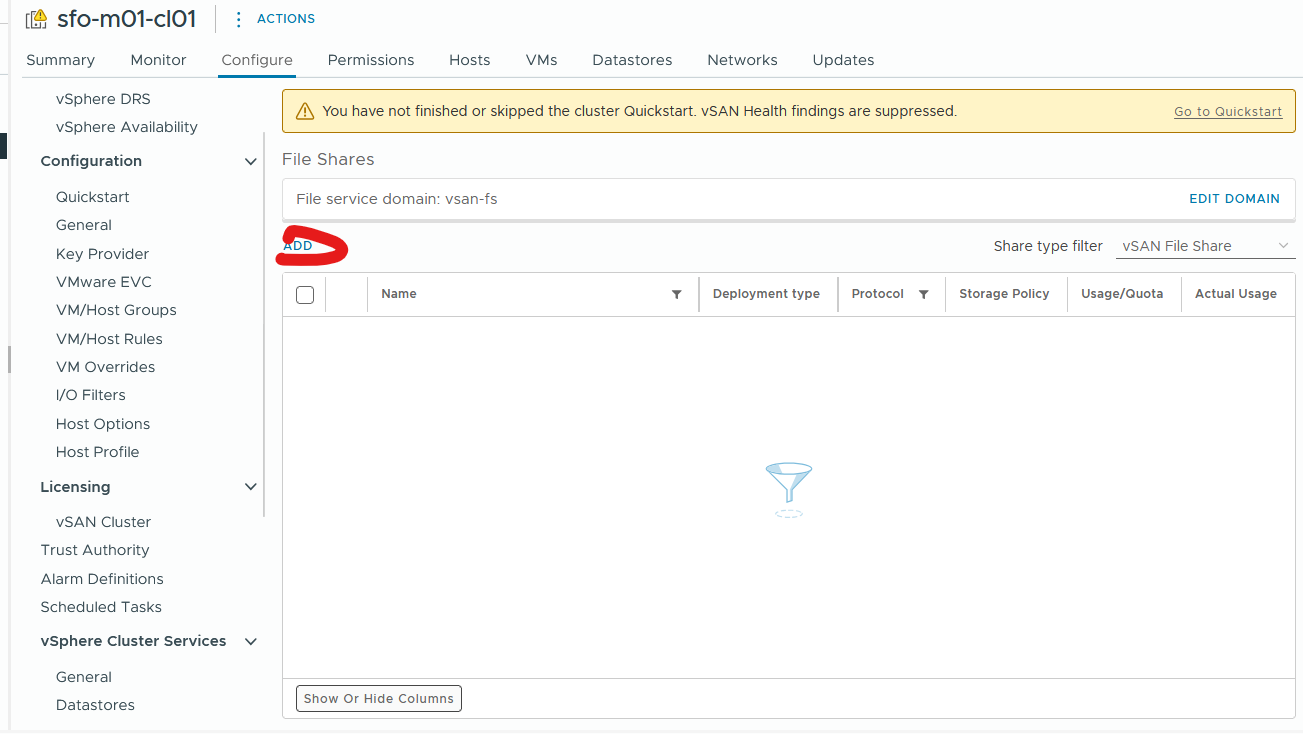
Add a new file share with your limits and security mode

In my lab I will only allow 1 ip address access to make things a little more secure

Click finish

Now I will test the connection
root@vcenter-mgmt [ ~ ]# showmount -e 10.0.0.180
Export list for 10.0.0.180:
/awx 10.0.0.12/32
root@vcenter-mgmt [ ~ ]# sudo mkdir /mnt/awx
root@vcenter-mgmt [ ~ ]# sudo mount -t nfs -o vers=3 10.0.0.180:/awx /mnt
Created symlink /run/systemd/system/remote-fs.target.wants/rpc-statd.service → /usr/lib/systemd/system/rpc-statd.service.
root@vcenter-mgmt [ ~ ]# sudo mount -t nfs -o vers=4.1 10.0.0.180:/vsanfs/awx /mnt
mount.nfs: mounting 10.0.0.180:/vsanfs/awx failed, reason given by server: No such file or directory
root@vcenter-mgmt [ ~ ]# df -h | grep awx
10.0.0.180:/awx 100G 0 100G 0% /mnt
root@vcenter-mgmt [ ~ ]# ls /mnt

root@vcenter-mgmt [ /mnt ]# sudo mkdir -p /mnt/awx
root@vcenter-mgmt [ /mnt ]# sudo mount -t nfs -o vers=4.1 vsan-fs002.vcf.sddc.lab:/vsanfs/awx /mnt/awx
root@vcenter-mgmt [ /mnt ]# df -h /mnt/awx
Filesystem Size Used Avail Use% Mounted on
10.0.0.180:/awx 100G 0 100G 0% /mnt/awx

nfsstat -m

All is working I can connect via version 3 and 4.1 nfs