The whole purpose of setting up an VLC VCF lab because it automates the build of VCF, builds it with minimal resources required and it is all nested.
Nested meaning virtual ESXi host, running virtual machines, running on a physical esxi hosts. The VLC VCF build can be modified for a more manual build, but I will not cover this in the blog.
I have an Poweredge R720 rack mount server with 320gb ddr3 memory, 2tb SSD Samsung evo, 16cores and ESXi 7u3 what I will use for this walk through.
Minimum resources you will need is 128gb memory, 800gb ssd, 12cores, esxi 7.0 + but more resources the better it will run.
High-Level Steps
STEP 1 – Setup your virtual switch and port group on your standalone ESXi physical host
STEP 2 – Setup your windows virtual machine on the physical ESXi host
STEP 3 – Download VLC, download VCF (cloud builder) and copy it to your virtual machine
STEP 4 – Modify your JSON file with your license keys
STEP 5 – Run VLC to start the deployment of VCF
STEP 1
Make sure your physical ESXi host is not managed by vCenter
Create your standard virtual switch
vSwitch Name – VLC
MTU 9000
Security setting as all accept
select your physical adapter (not required but if your trunking your switches and want it routable across your network)
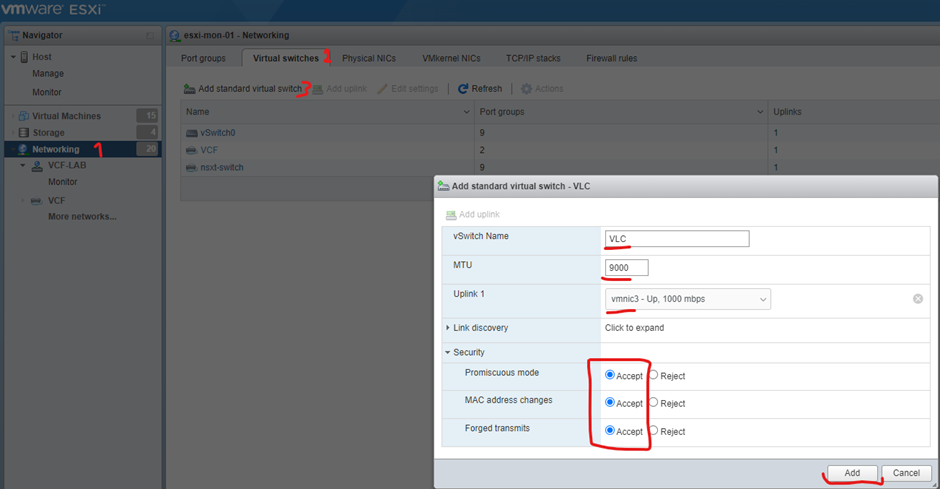
Create a port group
Name – VLC-PG
VLAN ID – 4095 (trunks all vlans)
Select your virtual switch you created in the previous task
Change security setting to accept for all

STEP 2
Setup a Windows 10, 2016 or 2019 jump box on your physical ESXi host. You’re going to use for VCF deployment.
Required software
- Powershell 5.1+ should already be installed
- PowerCLI 12.1+
https://developer.vmware.com/web/tool/12.7.0/vmware-powercli
- OVFTool 4.4+
https://developer.vmware.com/web/tool/4.4.0/ovf
https://customerconnect.vmware.com/downloads/get-download?downloadGroup=OVFTOOL443
- .Net Framework – might already be installed
https://dotnet.microsoft.com/en-us/download/dotnet-framework
- Browser either chrome or firefox
https://www.mozilla.org/en-US/firefox/all/#product-desktop-release
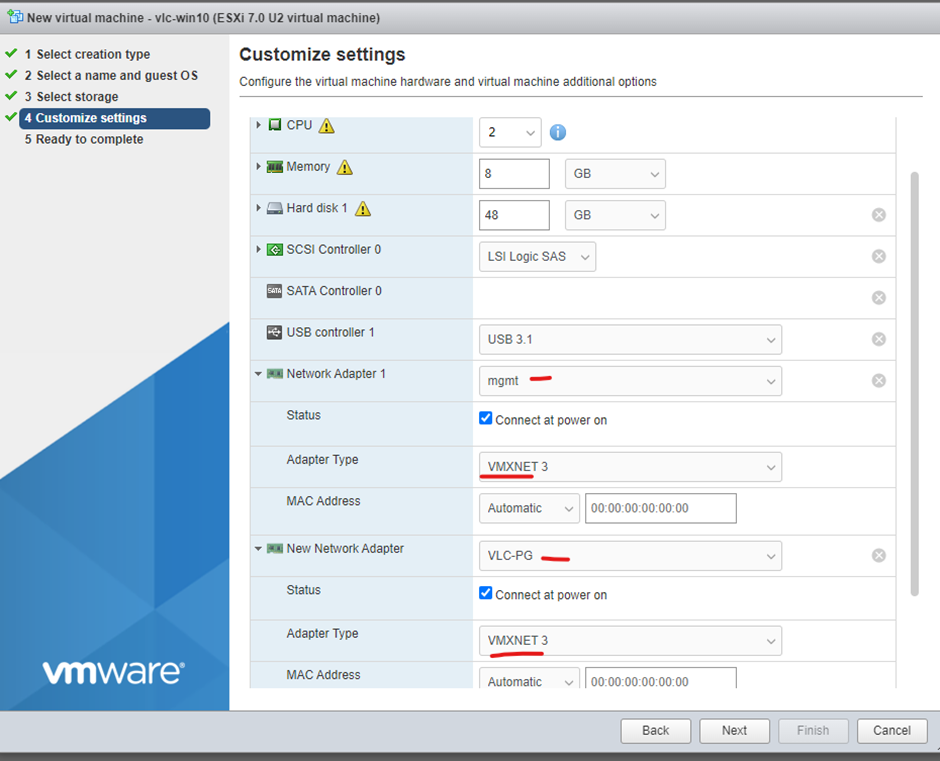
- Two VMXNET3 NICs – one on your esxi mgmt network and one on the new port group you setup (VLC-PG)
Settings
Copy software to the windows 10 jumpbox and install it

All the above software installation are straight forward but powercli you will need to copy the zip extracts (VMware-PowerCLI-12.7.0-20091289.zip) to the module’s location
Open powershell and type $env:PSModulePath
Copy files from the zip extract to the folders listed


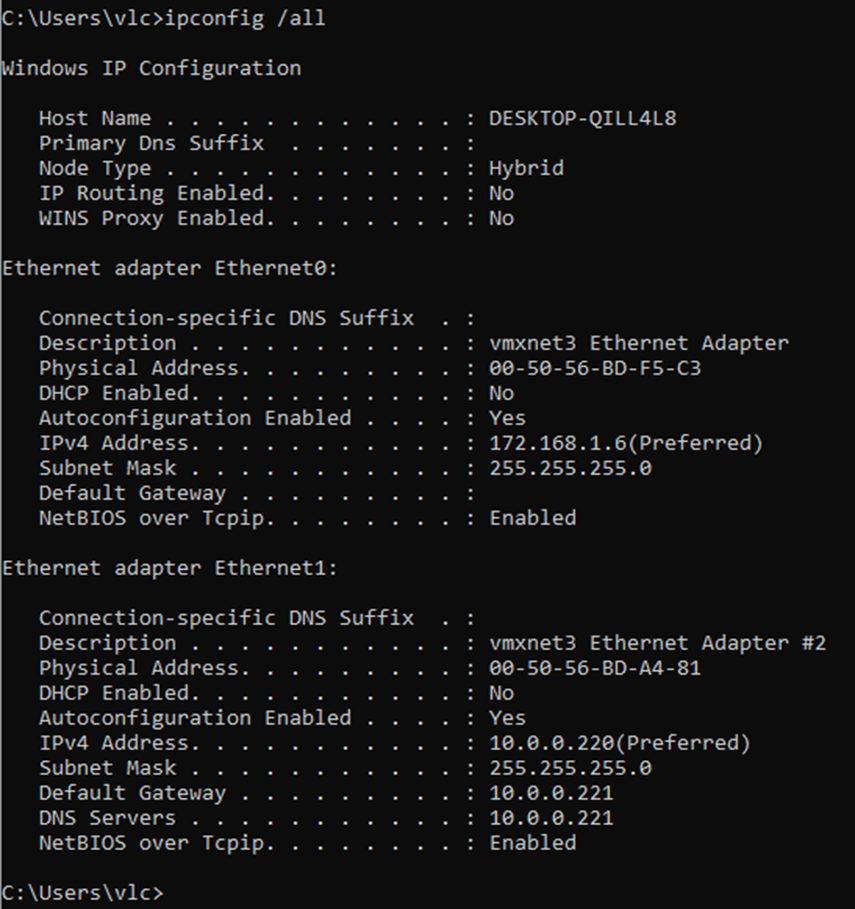
Nic 1 setting is my management network were my esxi host network is and so I can rdp to the jumpbox

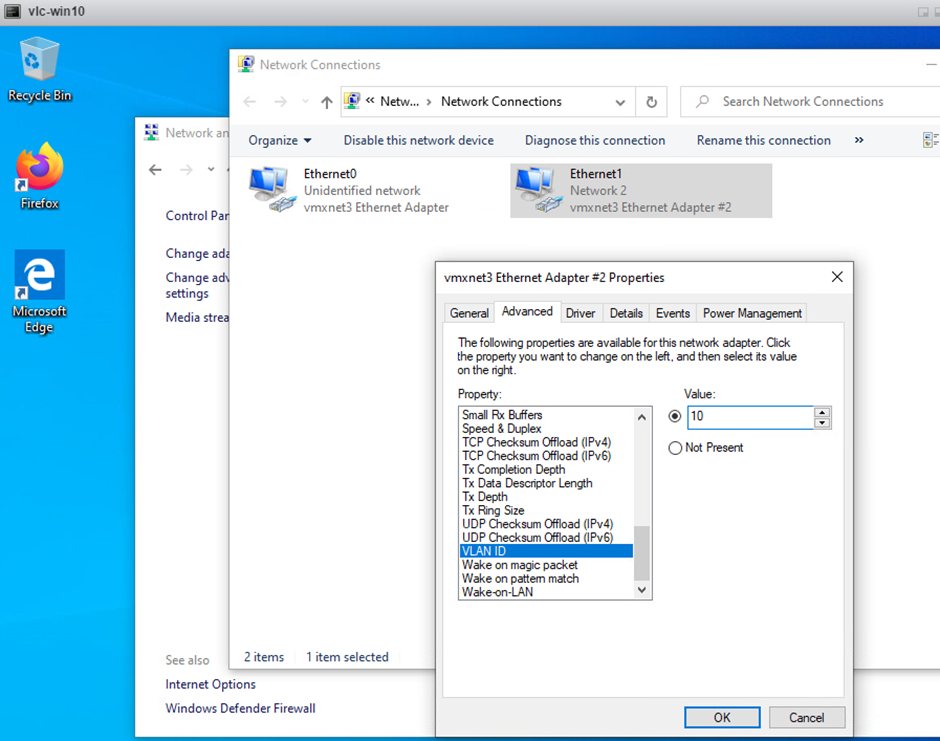
The Second nic is for the VCF setup
IP Address – 10.0.0.220
Subnet mask – 255.255.255.0
Gateway – 10.0.0.221
Dns -10.0.0.221
Vlan 10

Turn off windows firewall from the windows 10 jump box

STEP 3
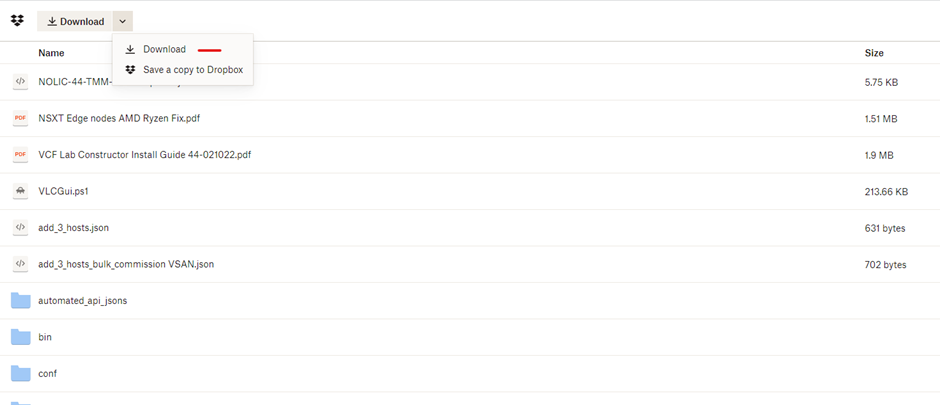
Download VLC using the below links and go through the registration.


Click the drop down on Download and click download
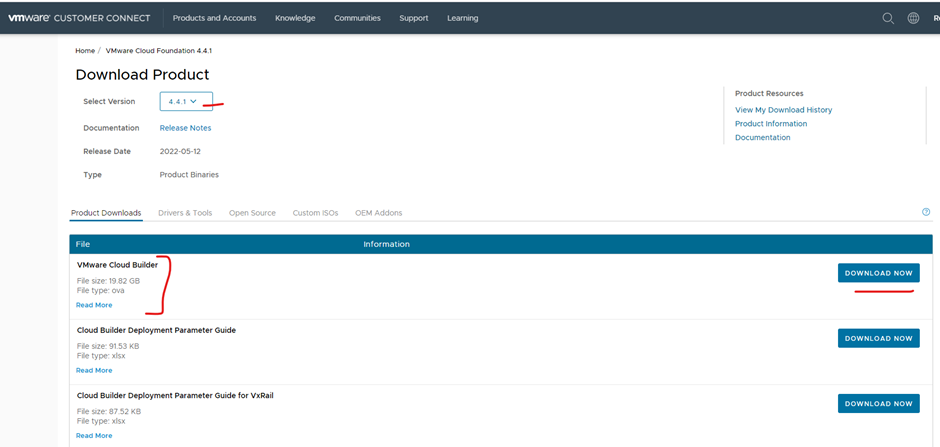
Download VCF that is version matching with VLC (so I will download 4.4.1)
https://customerconnect.vmware.com/downloads/details?downloadGroup=VCF441&productId=1252&rPId=88408
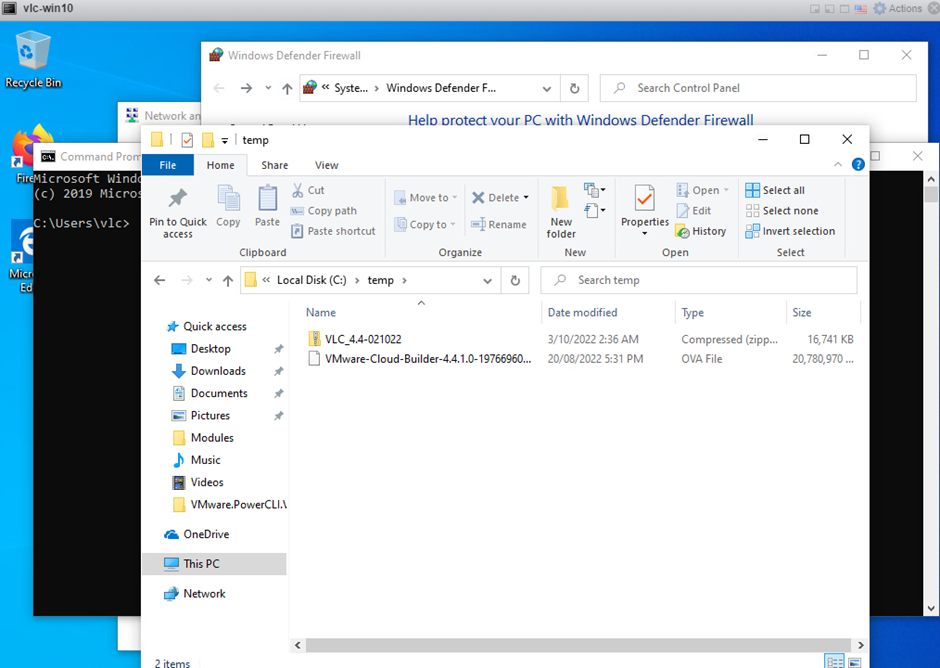
Once downloaded I will copy them over to the windows 10 virtual machine jump box
- VLC_4.4-021022.zip
- VMware-Cloud-Builder-4.4.1.0-19766960_OVF10.ova
STEP 4
Extract the vlc zip on the windows 10 jump box
Modify the NOLIC-44-TMM-vcf-ems-public.json with your license keys

Look for INSERT LIC
Should be one for
Esxi, nsx-t, vsan and vcenter

Save the file once you have updated your license keys
Step 5
Open powershell as administrator and go to the location of your VLC extracted folder
Type
Set-ExecutionPolicy -ExecutionPolicy Unrestricted
Type
.\VLCGui.ps1

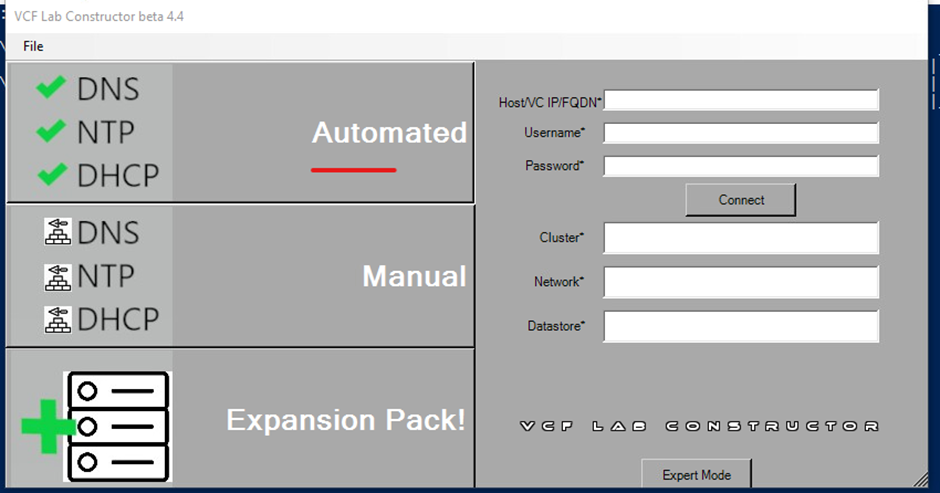
Click automated
Select VCF ems json file you have modified previously
Select the location of the ova file you have download from the vmware site
(VMware-Cloud-Builder-4.4.1.0-19766960_OVF10.ova)
Type in the ip address of your esxi host and root credentials
Click connect
Select network (VLC-PG)
Select your storage (the one that is ssd and has at least 800gb)

Select deploy edge cluster (if required)
Click Validate
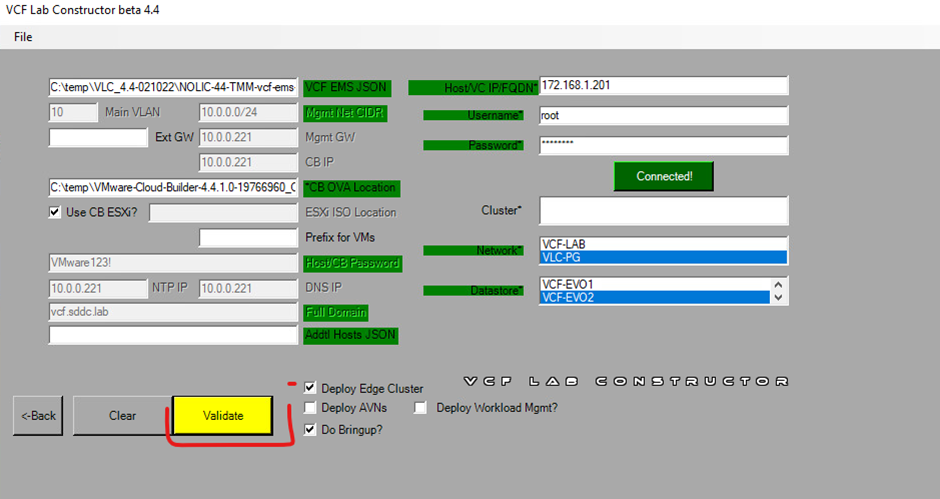
Click construct

Will take about 4hours to build if there is no issues

Looks like it had some issues deploying nsx-t components most likely edge, but it continued
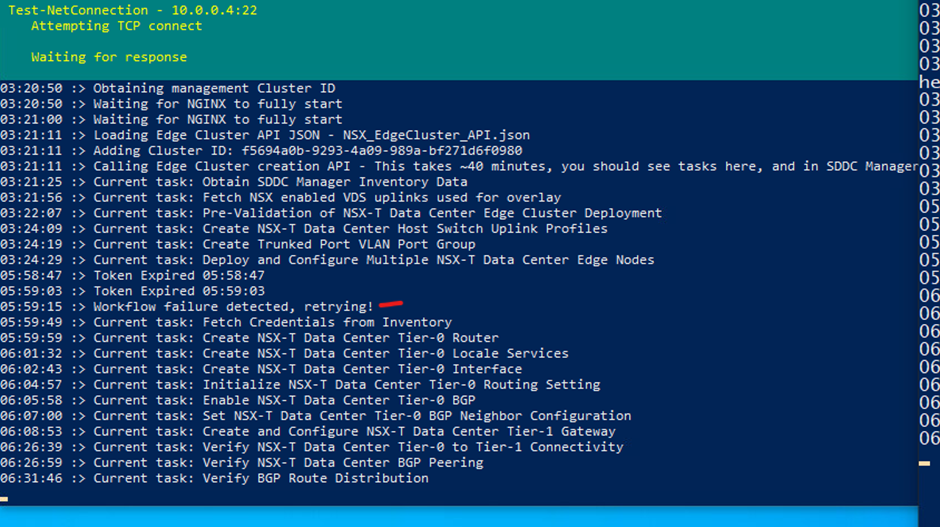
Completed, took long due to retrying the failed edge deployment

Sddc manager – https://10.0.0.4

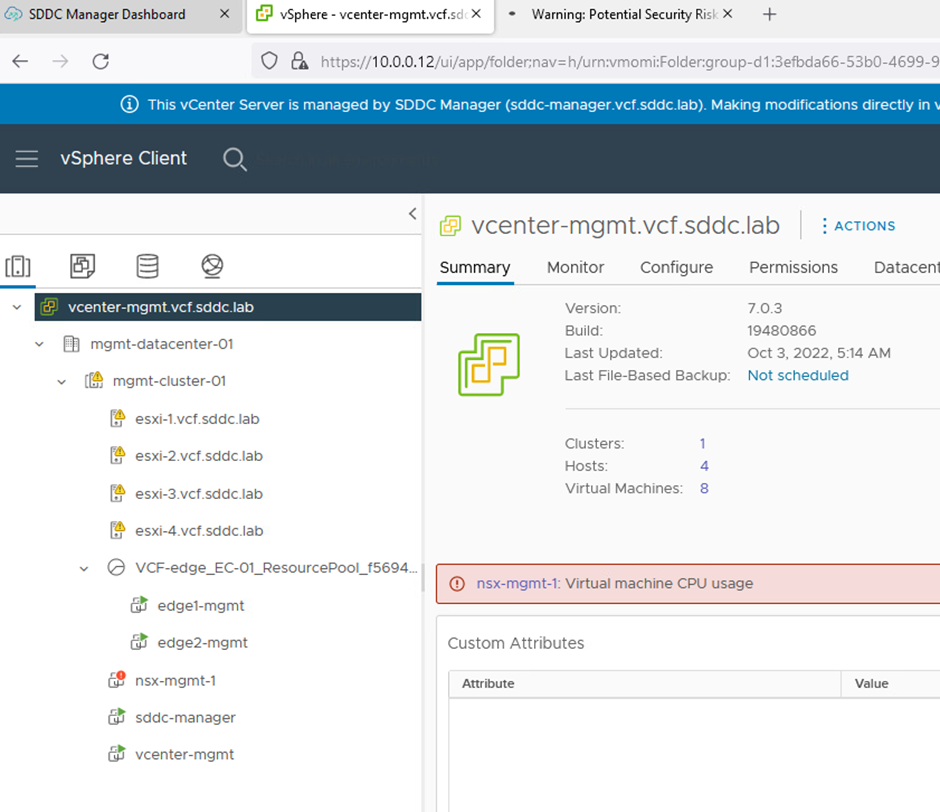
vCenter – https://10.0.0.12
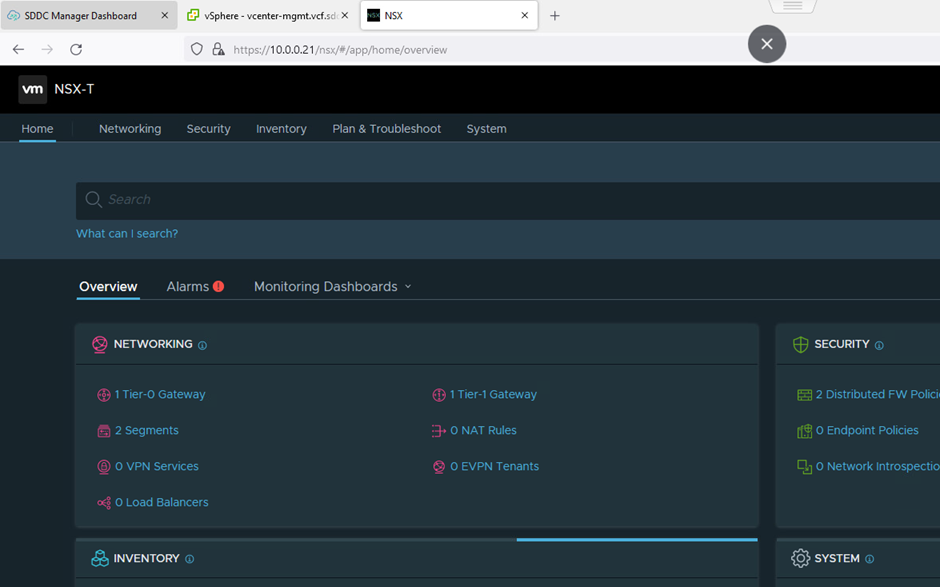
Nsx-t – 10.0.0.21 and 10.0.0.20
Esxi – 10.0.0.101, 10.0.0.102, 10.0.0.103, 10.0.0.104
All passwords are VMware123! Expect for nsx-t which is VMware123!VMware123!