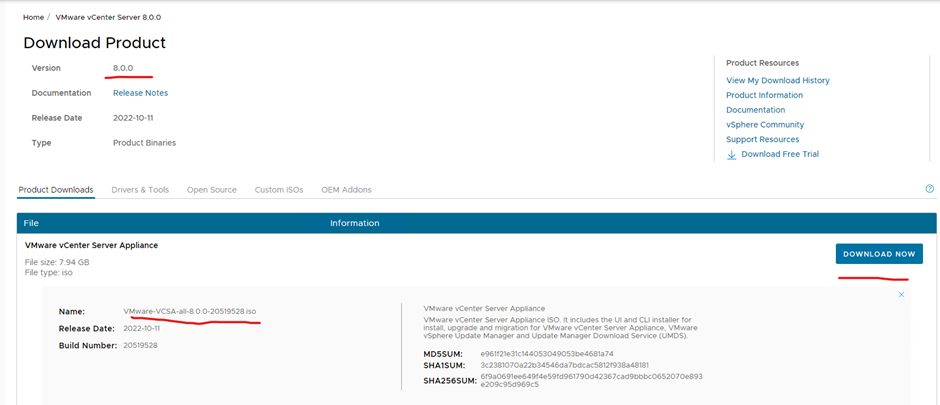
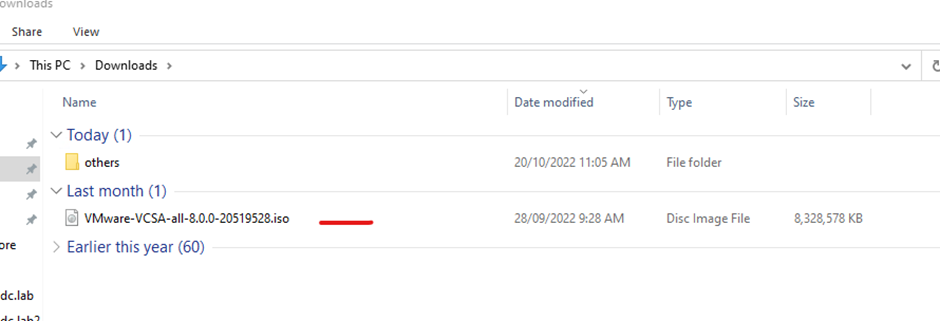
Download vCenter iso
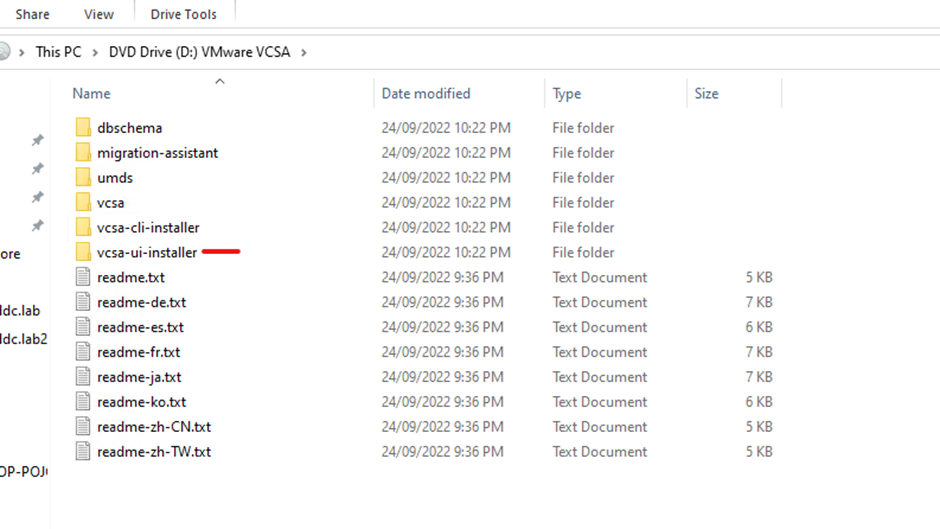
Run the iso
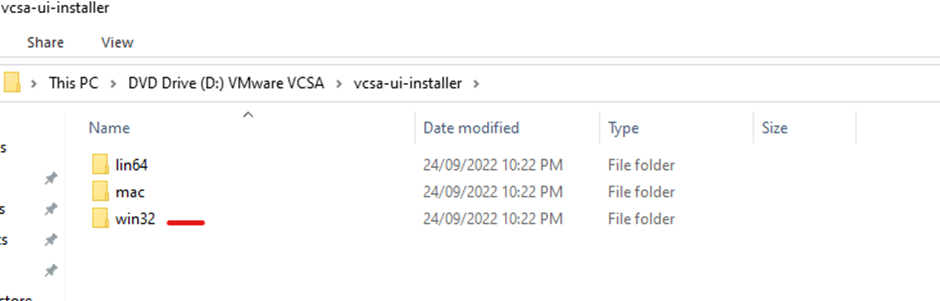
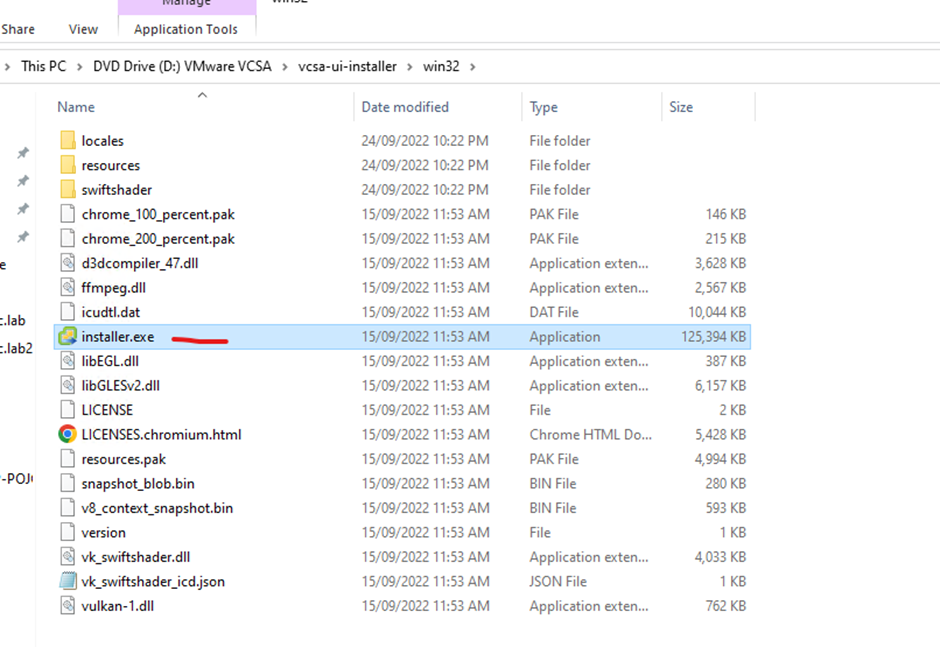
Open the vcsa-ui-installer directory
Open the win32 folder – since I am running it from a windows machine
Double click the installer.exe
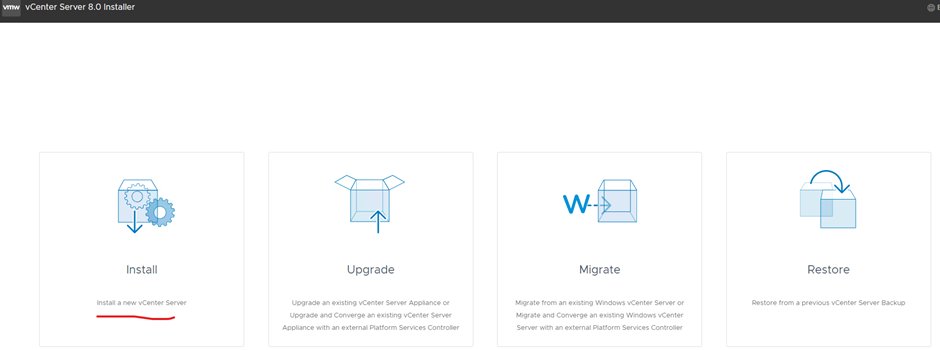
Click install
Click next
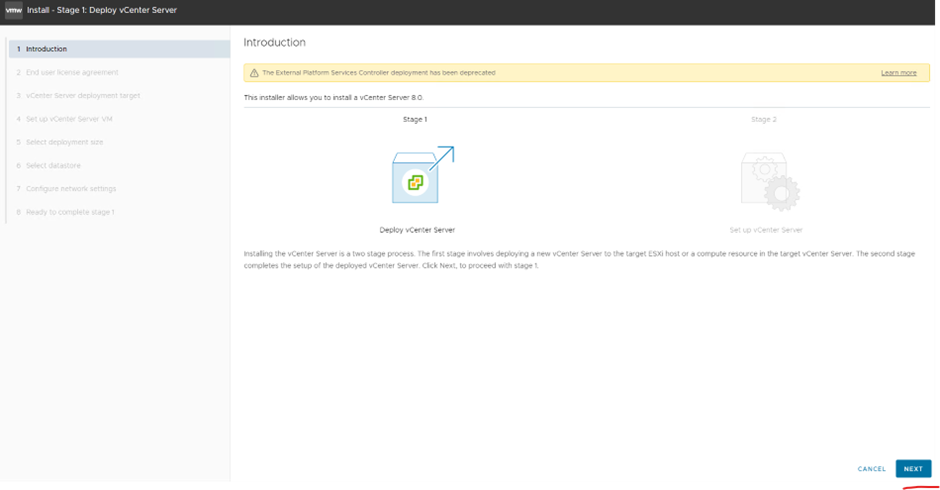
Accept agreement and click next

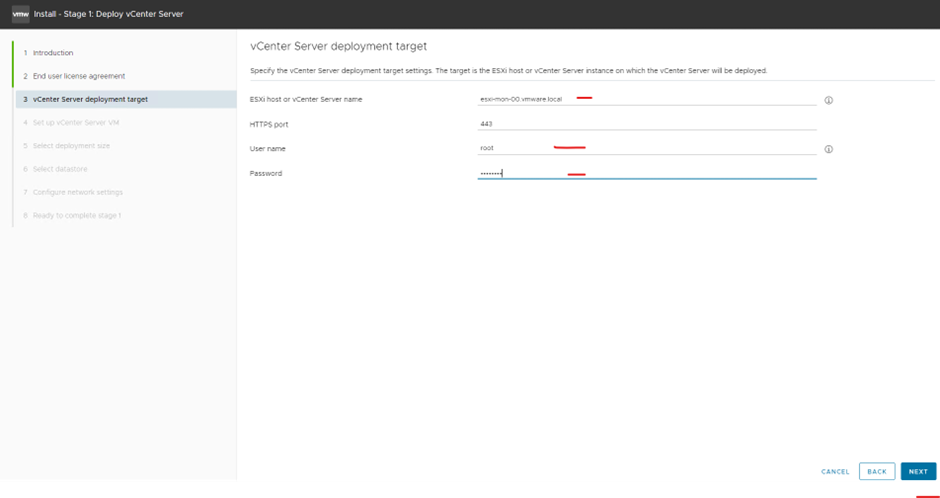
Type in the details of the vCenter or esxi host destination (where you want to put the vCenter machine)
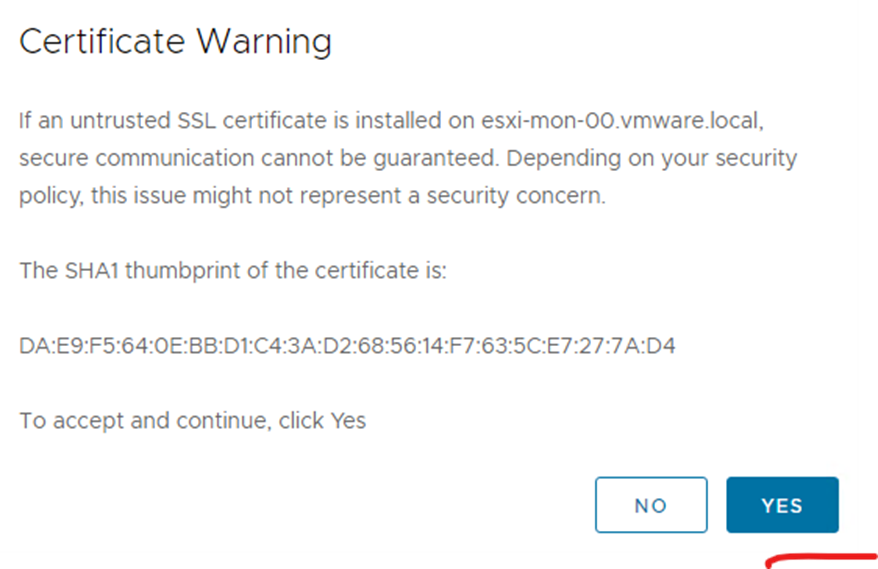
Accept the warning
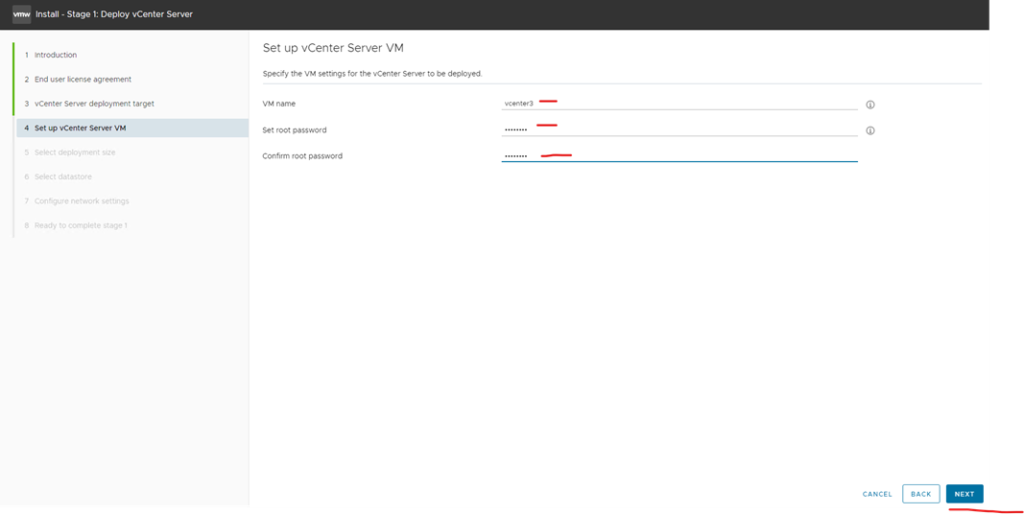
Type in your new vCenter virtual machine details (this name will show on your esxi host)
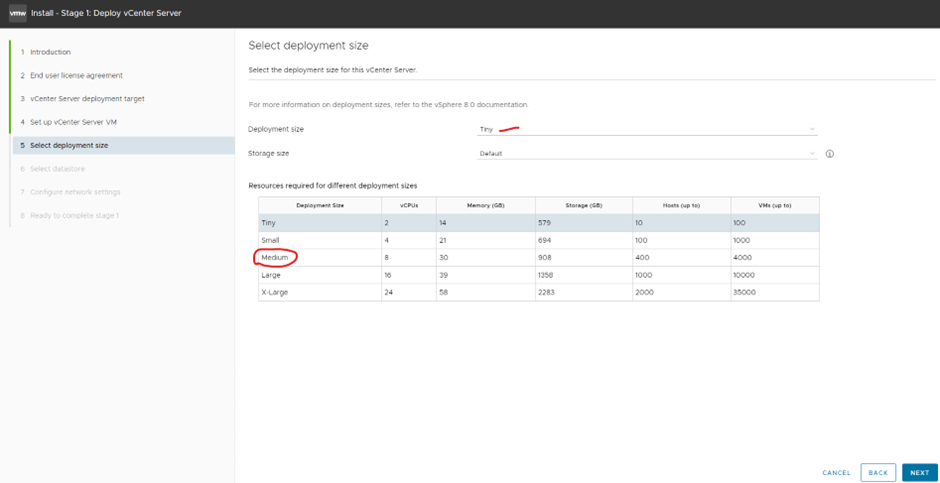
I am using deployment size tiny but in production environment I would go either Small or Medium and depending on the needs of the customer
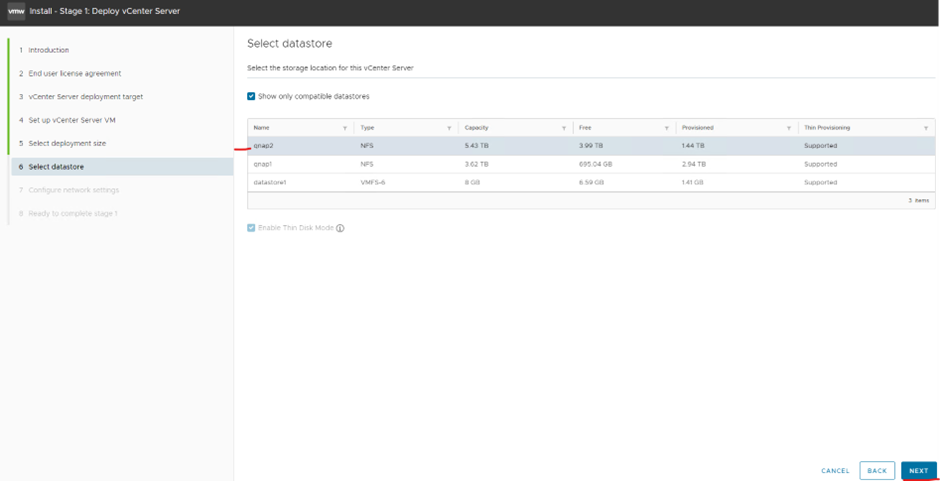
Select the location datastore for your new vCenter
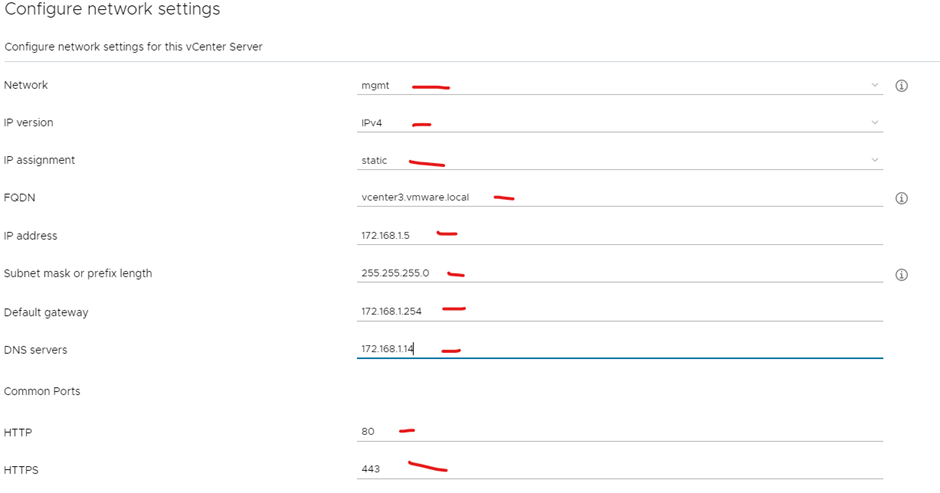
This is your vCenter details and your environment details

Confirm summary page and click Finish


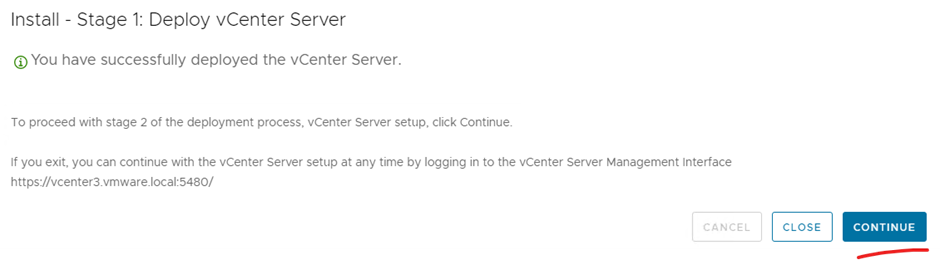
click Continue
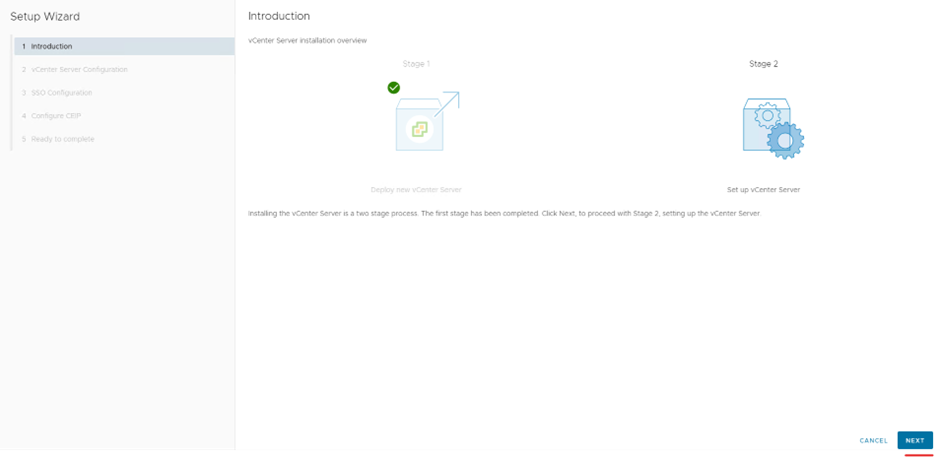
Click next
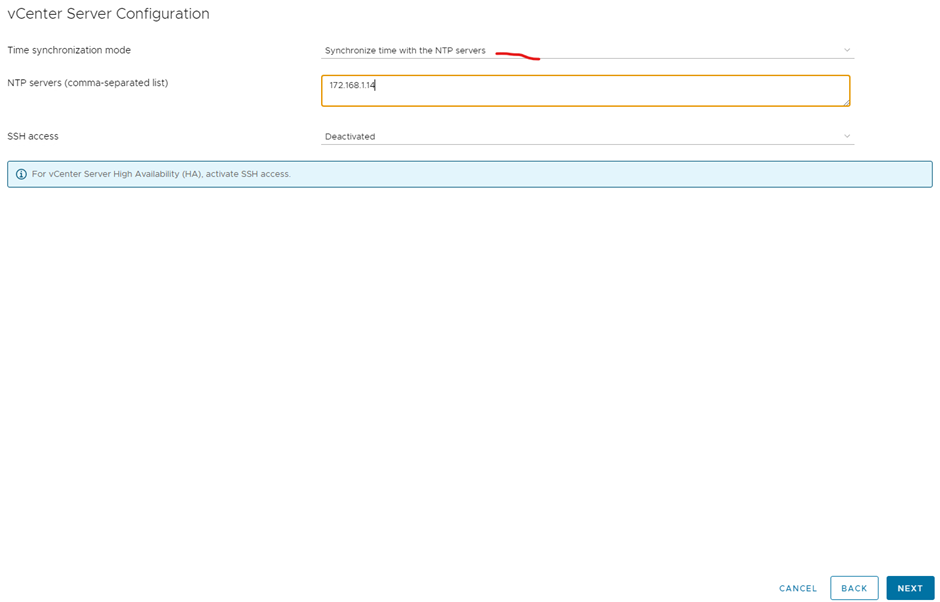
Select your NTP type and details > click next

If a message pops up type in your new vCenter password
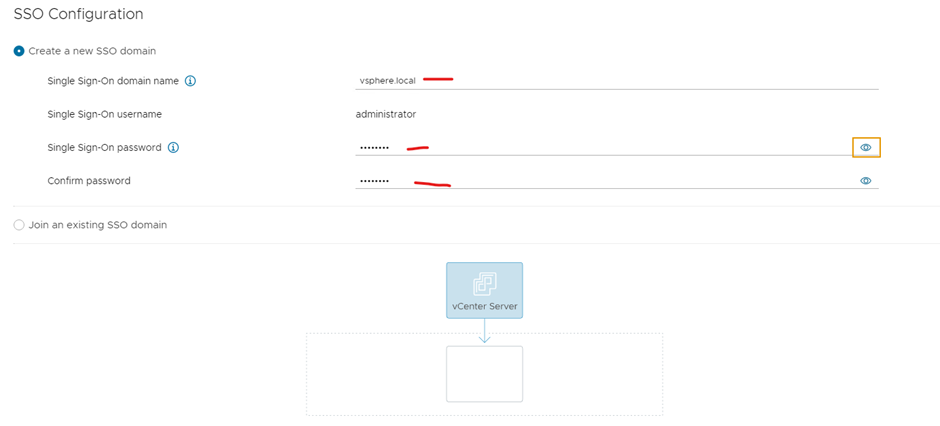
Type in your SSO domain details and click next
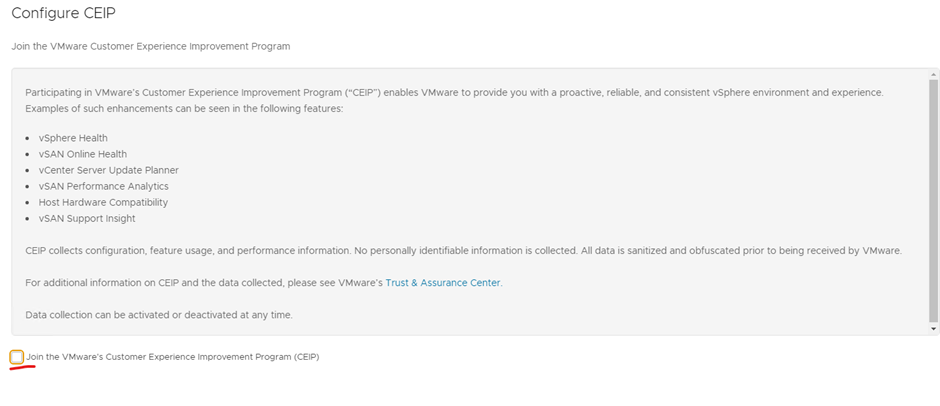
Untick join CEIP program and click next
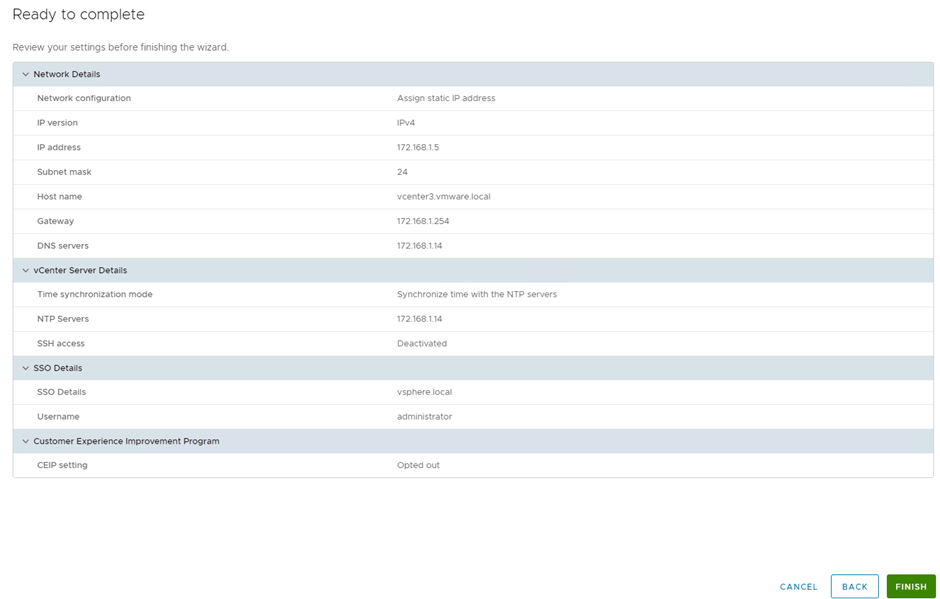
Check your details on the summary page and click finish
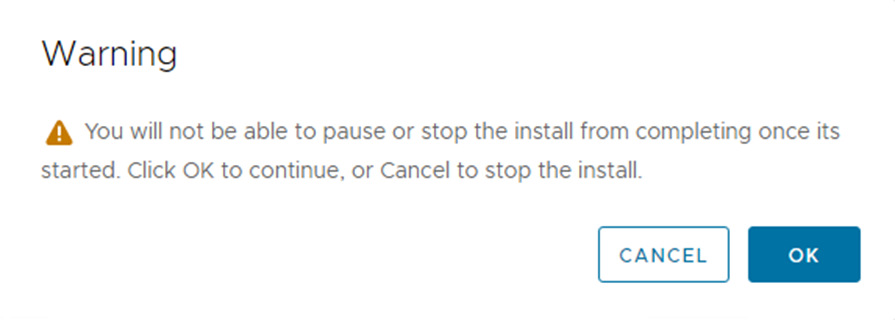
Click ok

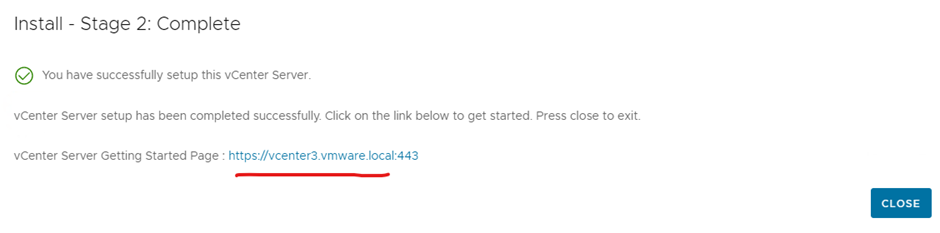
Click the getting started link page
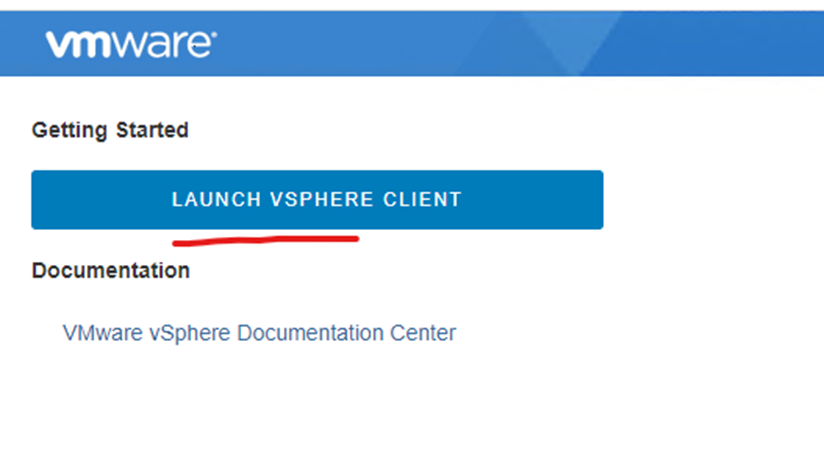
Click launch vSphere client
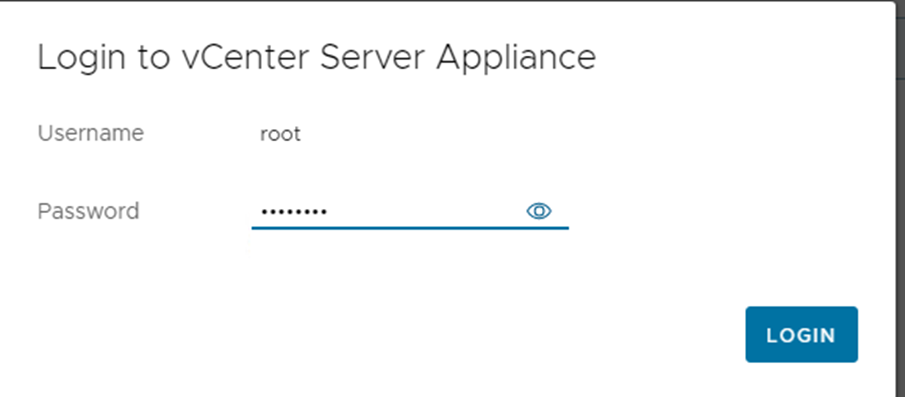
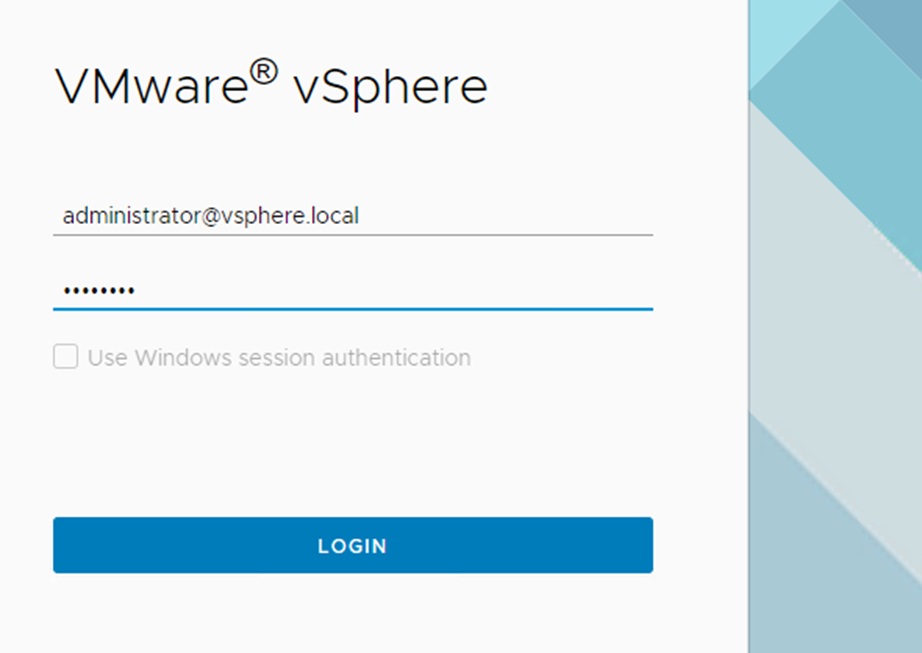
Type in your sso login detail and click login
Done

You can now start configuring your vCenter