In NSX-T version 3.2, VMware introduced a native vCenter plugin for NSX. This plugin makes NSX much easier to deploy and operate for existing vSphere users who don’t have much NSX or networking experience.
The plugin can be configured to for Security Only, or Virtual Networking as well depending on the requirements you have – whether you just want to increase the security of your vSphere environment with micro segmentation or utilise the full capabilities of NSX.
In Security Only mode, the NSX distributed firewall can be applied to each VM (using standard VDS port groups), but networking is still handled by the standard VDS in vCenter. No workload migration is required, and adoption is much simpler as all network configuration is still done through vCenter.
The NSX console for the vCenter Plugin is integrated into the vSphere web client – so you can manage your NSX security and networking constructs through the same interface as your vSphere inventory without having to access the NSX Manager separately.
Limitations
With the vCenter plugin for NSX-T 3.2, NSX will only recognize a single NSX Manager appliance protected by vSphere HA (rather than a three node cluster as with a standard NSX installation).
If you choose Security Only mode, you are unable to use any NSX routing features.
Prerequisites
The following prerequisites must be met to use the vCenter Plugin (applicable for both NSX 3.2 and NSX 4.0 deployments):
- vCenter Server version 7.0.3 or later
- ESXi hosts are connected to a vSphere Distributed Switch (VDS) version 6.6 or later
- vCenter Server has a FQDN that can be resolved by your DNS server
- ESXi host that can support an NSX Manager appliance with minimum 24 GB RAM and 6 vCPUs
Deployment Process
While the process is relatively straightforward, I have documented it below for reference and made note of a few key things you should know to ensure a smooth deployment.
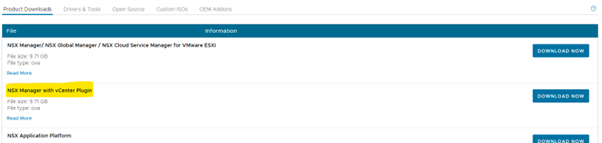
1. Download the NSX OVA file from VMware Customer Connect. Note that you MUST download the NSX Manager with vCenter Plugin file and you cannot use the standard NSX Manager OVA to have the full vCenter integration.
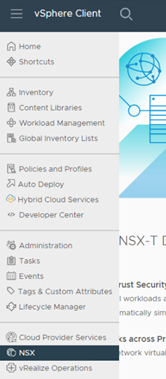
2. Navigate to the NSX page within vSphere. Select Install NSX.
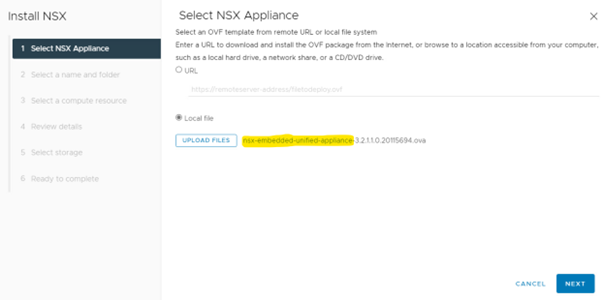
3. Upload the correct OVA (the “embedded unified appliance”) and select Next.
4. Continue through the menu prompts by selecting Next. You can change the virtual machine name and destination if desired.
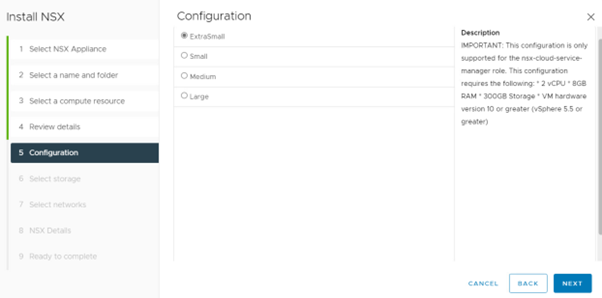
5. Select your desired appliance size and click Next. You MUST choose Medium or Large – unfortunately ExtraSmall and Small deployments seem to fail every time after the OVF template is deployed.
6. Select your storage destination and click Next, then select your destination network and click Next.
7. On the “NSX Details” page, enter the IP, DNS and NTP details for your appliance, then select Next. Note that NSX has more complex password requirements than vSphere.
8. Review your choices, select Finish, and wait for the tasks to complete – this could take some time.
9. Once the installation has finished, you will be prompted to enter a license key. You can then choose between the Security Only or Virtual Networking workflows, which will guide you through the initial NSX configuration.
