The NSX Upgrade Evaluation Tool allows you to quickly detect any data-migration issues you may run into when performing an upgrade to NSX. The tool does not solve these issues but will help you identify any possible complications that will arise because of the upgrade. It’s recommended that you run this tool twice – once before you complete any upgrade, and once again after the completion of the edge and host transport node upgrades (in case your environment has changed during the upgrade process).
The tool is a VM that you must deploy in your environment. It must be able to reach any one of your existing NSX Manager nodes via SSH. In this example, I’ve simply deployed the NSX Upgrade Evaluation Tool in the same vSphere cluster as my NSX Managers. You’ll need 24 GB of RAM, 6 vCPUs, and 300 GB of storage space for the NSX 4.0 tool.
Process:
1. Download the OVA file from VMware Customer Connect. The tool can be found on the NSX product download page for the version you want to upgrade to, under NSX Upgrades.

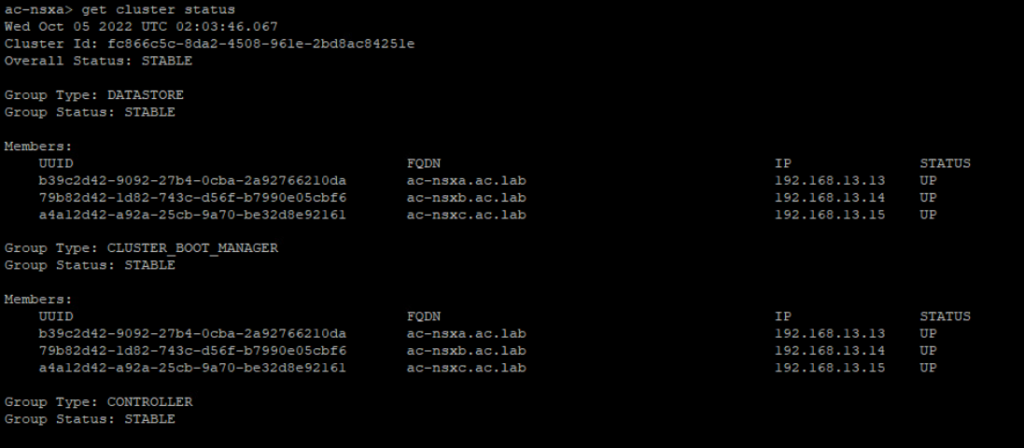
2. Check the status of your NSX cluster by accessing the NSX Manager console and entering the command get cluster status. All cluster services should be UP.
3. Enable root SSH on the NSX Manager node that you want the tool to connect to. You may have already enabled this option during deployment of the node, but if it is disabled you can do the following steps to enable it:
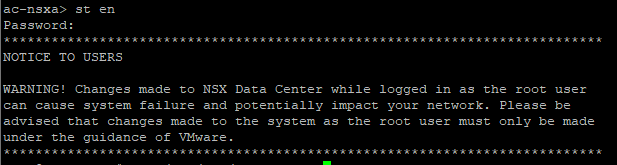
Access the NSX Manager console as root – either log in directly, or access the VM via SSH as the vcf user and elevate to root using the command st en.
Use the command vim /etc/ssh/sshd_config to edit the SSH configuration file. Press i to enter insert mode, navigate down to the Permitrootlogin line, and change the value to yes.
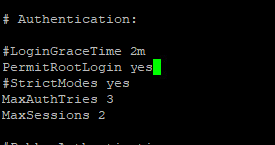
Press escape to exit insert mode, then type :wq and hit enter to save your change and exit. Restart the SSH service with the command /etc/init.d/ssh restart to apply the change.

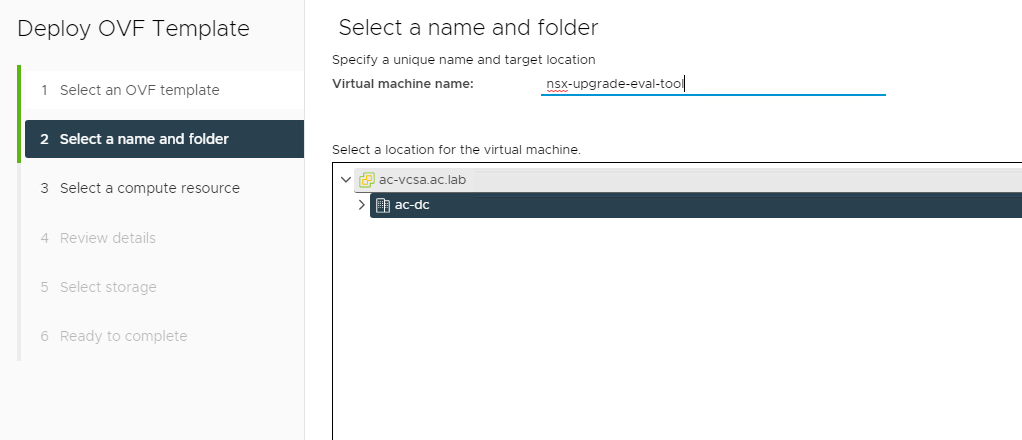
4. Deploy the OVA file as a virtual machine in your environment. In vSphere, right click on your cluster or resource pool and select Deploy OVF Template.

Choose to upload a local file and select the OVA you downloaded in step 1.

Give your VM a name and choose its location.
Continue through the prompts, selecting a compute resource and confirming the deployment details. You must choose the Medium size configuration.

Assign the VM a storage location (the tool supports being thin-provisioned), and a network port group that will enable connectivity with your NSX Manager node.

Finally, specify the passwords and network properties for the tool. User passwords must follow the same guidelines as NSX Manager passwords, with a minimum of 12 characters required. Also note that the hostname must not contain spaces and must not start with a hyphen.

Review your configuration and select Finish to deploy the tool.
5. Power on the VM, and wait for all start jobs to finish. When the login prompt appears, log into the CLI with the username admin and the password you specified during OVA deployment.

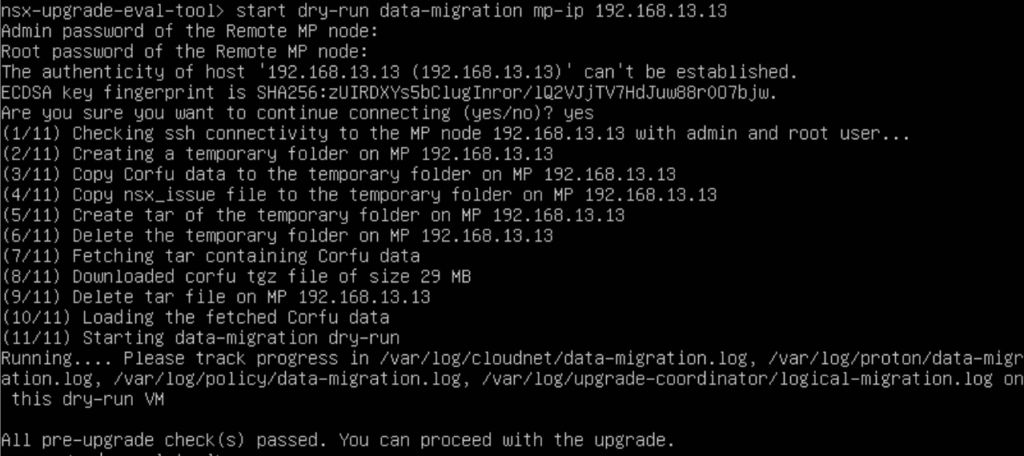
Enter the command start dry-run data-migration mp-ip <NSX Manager node IP> to start the tool and wait for the result.
6. You may delete the VM after you have completed your upgrade.
Further VMware documentation for this tool is available at https://kb.vmware.com/s/article/87379.