What is VMware Integrated OpenStack?
VMware Integrated OpenStack serves as a means to host your own private cloud infrastructure for the consumption of external users. The most ideal parallel that i like to make in my mind is to that of an AWS EC2 Management dashboard. Users can request compute, storage and networking all through a standardized OpenStack deployment structure while being able to utilize there existing datacenter infrastructure.
Throughout this 3 part series we will be looking at how to setup a nested environment to be able to spin up and play with a VMware Integrated OpenStack Environment.
In order to successfully install VMware Integrated OpenStack (VIO) there are a number of pre-requests that must be in place. For this tutorial i will be using a single server in a Lab Environment.
Pre-Requests
There are multiple ways to deploy VIO which can provide different levels of resiliency and capacity but for this tutorial we will be going with the basic setup of a single node deployment which should allow for the entire stack to be hosted on a single machine.
Prior to beginning as this is being hosted on a single machine it is imperative that there is over 96GB of RAM available in your environment prior to beginning as we will be creating a small 3 node vSphere environment within the Management environment to use as our resource host.
If your using more than a single host skip over to part 2 where we begin to look at how to configure NSX-T in preparation for VMware Integrated OpenStack.
The software that will be required for this tutorial is as follows:
- 2x vSphere Environment (ESXi + vCenter)
- 1 as the Management Domain where we will place our supporting applications such as VIO LifeCycle Manager & NSX-T
- 1 as the Resource Domain which will be the vSphere Instance which OpenStack consumes to run it’s VM’s
- NSX-T Datacenter
- This will be used by OpenStack to configure and create networks on our recourse vSphere cluster.
- VMware Integrated OpenStack Appliance
- This will serve as the appliance that is used to manage our OpenStack Instance. Just as everything else this comes directly as an OVA that can be deployed.
Systems Expected to be in place already:
- NTP (Important as it is a Containerized solution and time drift is possible)
- DNS
- Management Cluster on the physical host (i.e a vSphere environment that has been setup)
Setting Up The Networking
Prior to even beginning to deploy application we first need to create our DNS entries within our resolver. In this instance im using Windows Server. The DNS values that will be required are as follows
| FQDN | VLAN | IP |
|---|---|---|
| Nested Environment | ||
| nested-esxi01.au.lab | 10 | 10.12.10.50 |
| nested-esxi02.au.lab | 10 | 10.12.10.51 |
| nested-esxi03.au.lab | 10 | 10.12.10.52 |
| nested-vCenter.au.lab | 10 | 10.12.10.53 |
| VIO Records | ||
| vio-manager.au.lab | 10 | 10.12.10.24 |
| vio-vip-private.au.lab | 10 | 10.12.10.25 |
| vio-vip-public.au.lab | 14 | 10.12.14.10 |
| Management Appliances | ||
| nsx-manager.au.lab | 10 | 10.12.10.17 |
| edge01.au.lab | 10 | 10.12.10.8 |
Furthermore VLANs will also need to be created as follows:
- VLAN 10: Management VLAN (10.12.10.0/24)
- VLAN 11: Host TEP Network (10.12.11.0/24)
- VLAN 12: Edge TEP Network (10.12.12.0/24)
- VLAN 13: BGP Neighbours (10.12.13.0/24)
- VLAN 14: VIO API Network (10.12.14.0/24)
And finally as we are using NSX-T we will also require the use of jumbo frames to support the Geneve encapsulation.
Setting Up The Resource vSphere
With the software and the networking now set in place we can now begin with setting up our nested environment. (finally)
While we can go ahead and deploy the nested ESXi instance manually through the use of the ESXi image i find that using Willam Lam’s Deployment scripts provides a much quicker way of spinning up a nested instance and having vSAN configured.
By navigating to the following address we can see a list of virtual appliance scripts that we can download to setup the environment. In this instance go ahead and select ESXi 7.0U3c from the list.
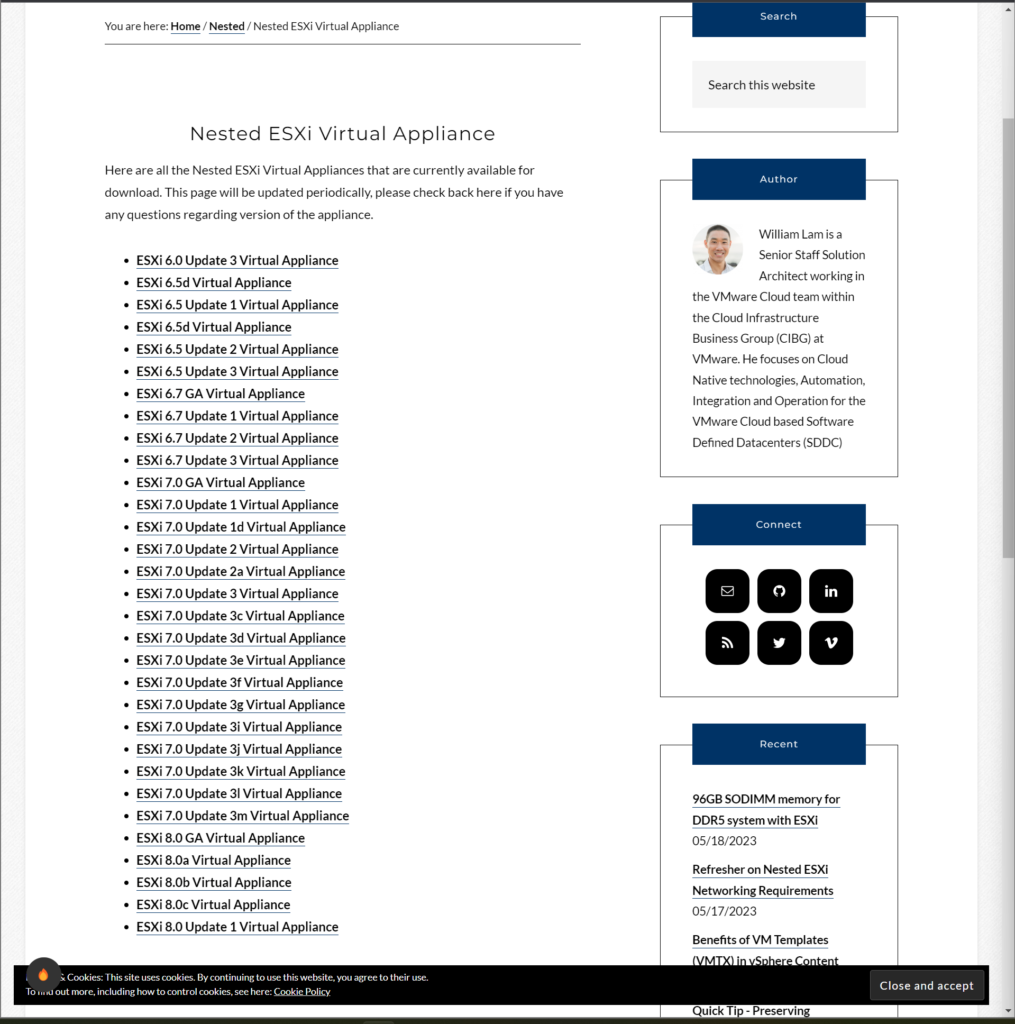
https://williamlam.com/nested-virtualization/nested-esxi-virtual-appliance
This will then go ahead and download a custom OVA for the specific version of ESXi that we selected. Following this we also need to obtain a copy of vCenter Server 7. This can be done directly through VMware Customer Connect or through a partner channel if available.
Once Willam Lam’s OVA is downloaded and vCenter is downloaded the final piece of the puzzle is the script to put it all together. Navigate over to Willam Lam’s GitHub page and download the vSphere 6-7 Lab Deployment script
(don’t worry about using vSphere 7 in this instance as still works perfectly fine with the script)
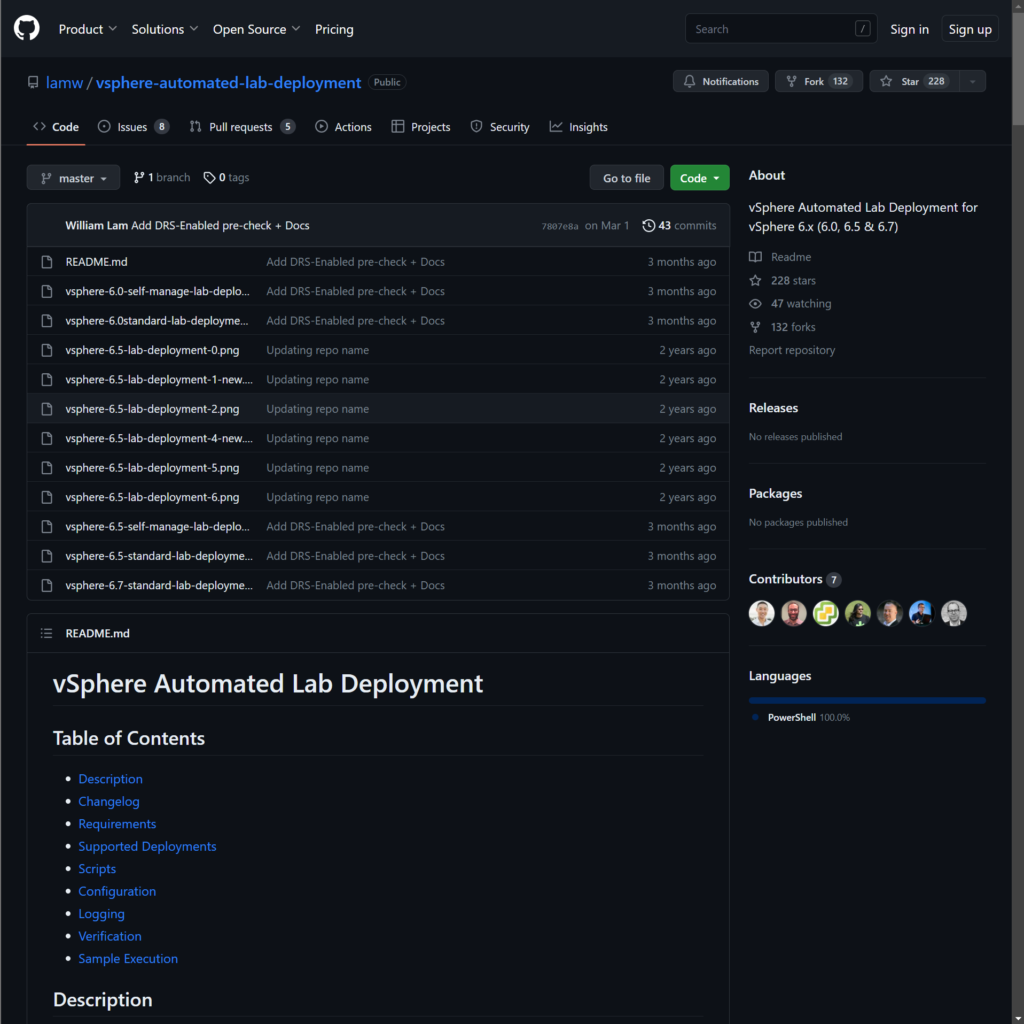
https://github.com/lamw/vsphere-automated-lab-deployment
When all 3 files are downloaded place them into a folder and verify that everything is in place:

Following this we want to mount the VCSA Disc Image that was downloaded as this will be used to deploy our nested vCenter appliance. This can be done by double clicking on the image in windows and selecting open. This will mount the CD to the D drive of the machine which we will later reference in the PowerShell script downloaded.
![]()
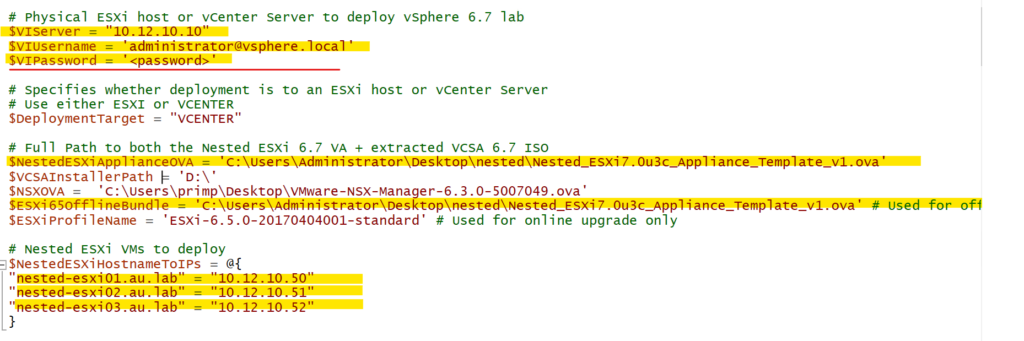
- Edit the PowerShell script and add in the appropriate IP addresses for the nested instance as well as fill in any existing information around the existing vCenter instance. Feilds to be edited include:
- VIServer: Existing vCenter IP Address
- VIUserName: Administrator Username for existing vCenter
- VIPassword: Administrator Password
- NestedESXiApplianceOVA: Location of the downloaded OVA
- ESXi6.5OfflineBundle: Same as abov
- NestedESXiHostnamesToIP: Nested Appliance Hostnames and there IP’s

Within the General Deployment (line 78) section the remaining information is all around the existing vCenter environment. For example
- VMNetwork: Refers to a Port Group that exists on a VDS on the host vCenter
- VMDataStore: an existing datastore in vCenter
and the remainder of the information is around pre configured systems such as DNS and NTP.
Ensure that all of the highlighted sections of the script has the correct information and finally save the script.
- As this script uses PowerCLI to run you may also want to ensure that the latest binaries are installed to PowerShell Following the tutorial here: https://docs.vmware.com/en/VMware-vSphere/7.0/com.vmware.esxi.install.doc/GUID-F02D0C2D-B226-4908-9E5C-2E783D41FE2D.html will help setup this module.
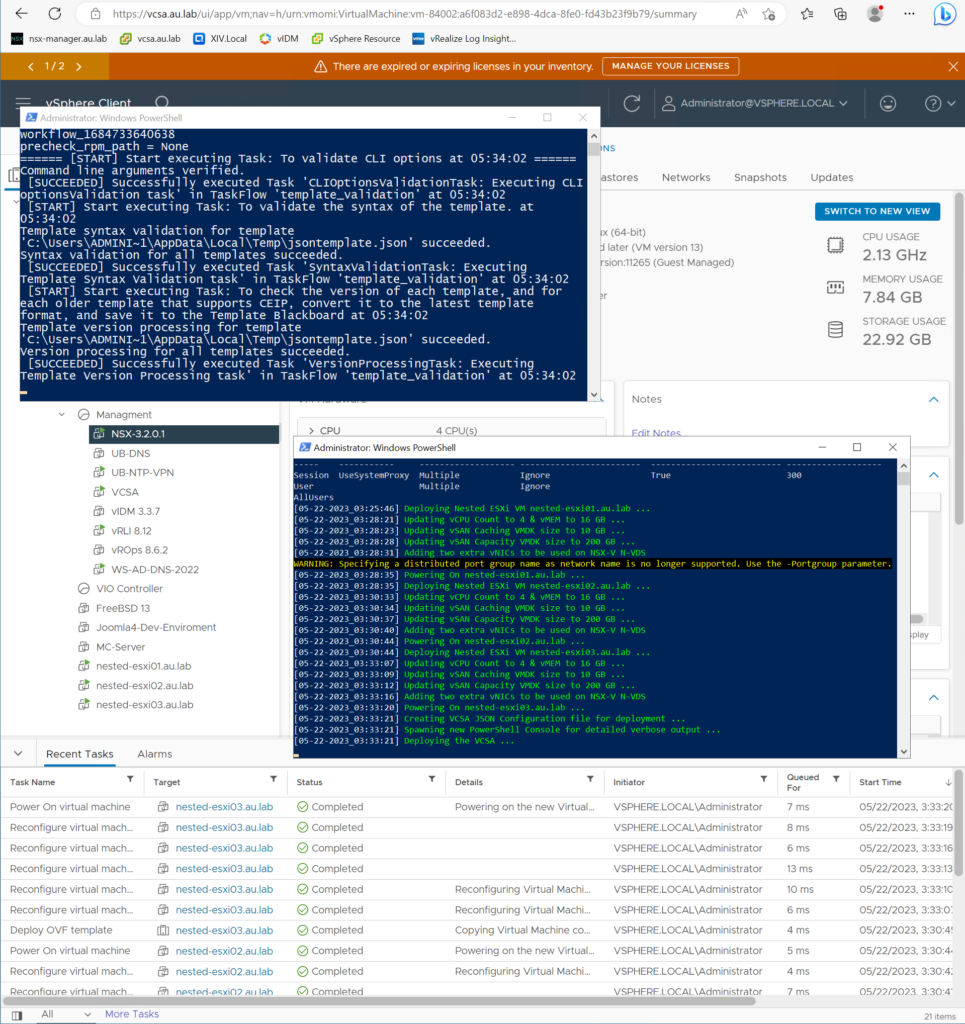
- Navigate to the location of the script and then directly run it to get a confirmation of the configuration that has been done within the script. Verify that it all looks correct and then Type Y to continue with the deployment.


From here it will connect to the existing vCenter that was included in the script and begin to deploy the nested appliances.
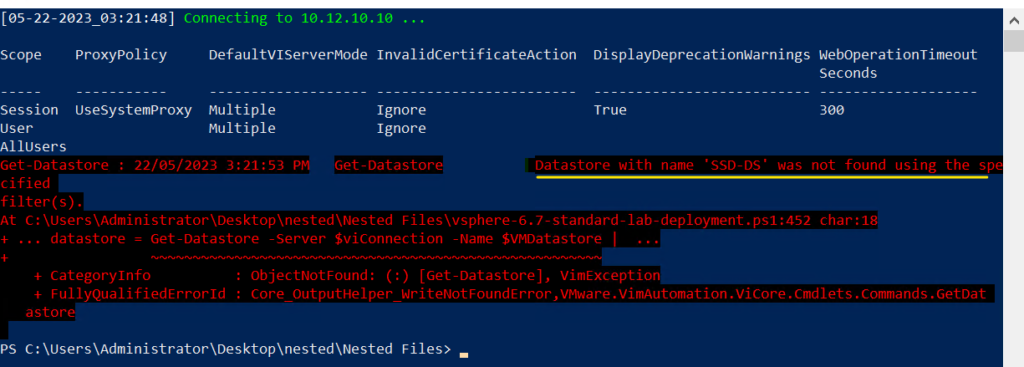
Note: If any errors occur during this process simply use Ctrl + C to cancel the operation. Open the script make any edits that are required and then try again. if there are any errors you will often get a descriptive error message that will direct you to the error such as the example below
If successful you will be able to see the OVA’s being uploaded in the vCenter that was defined. This may take upwards of 1 hour depending on the type of hardware that it is being deployed to. Give it some time and at the end of the process you will see the entire nested environment is automatically bundled into a vApp which allows for easy management of the environment.


- Once complete you will be able to login to the vCenter through the FQDN that was provided in the script and you’ll see that a three node cluster has been created along with an automatically provisioned vSAN instance.
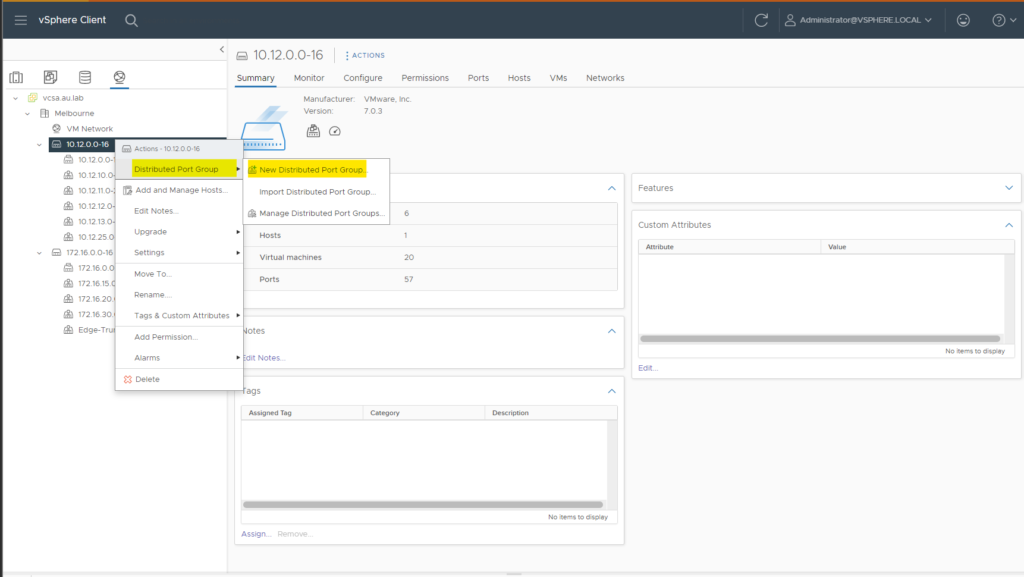
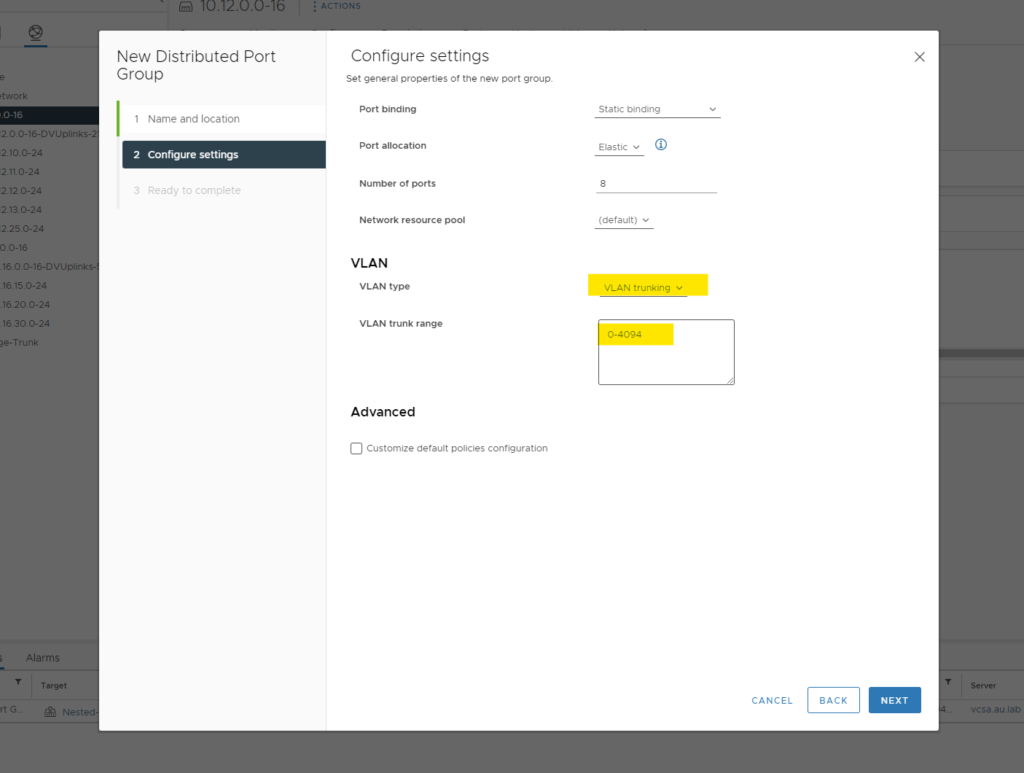
- The last part which we will be doing is connecting the nested ESXi hosts to a trucking port group on our physical host. This is done so we can support TEP routing within our vCenter instance. You’ll notice that the nested instance has 4 network adapters which are all set to the same management network. In order to connect our hosts to NSX we want at least 2 of these to be on a trucking interface. We can do this by navigating to the networking tab in our host vCenter and creating a new Trunking portgroup on our VDS
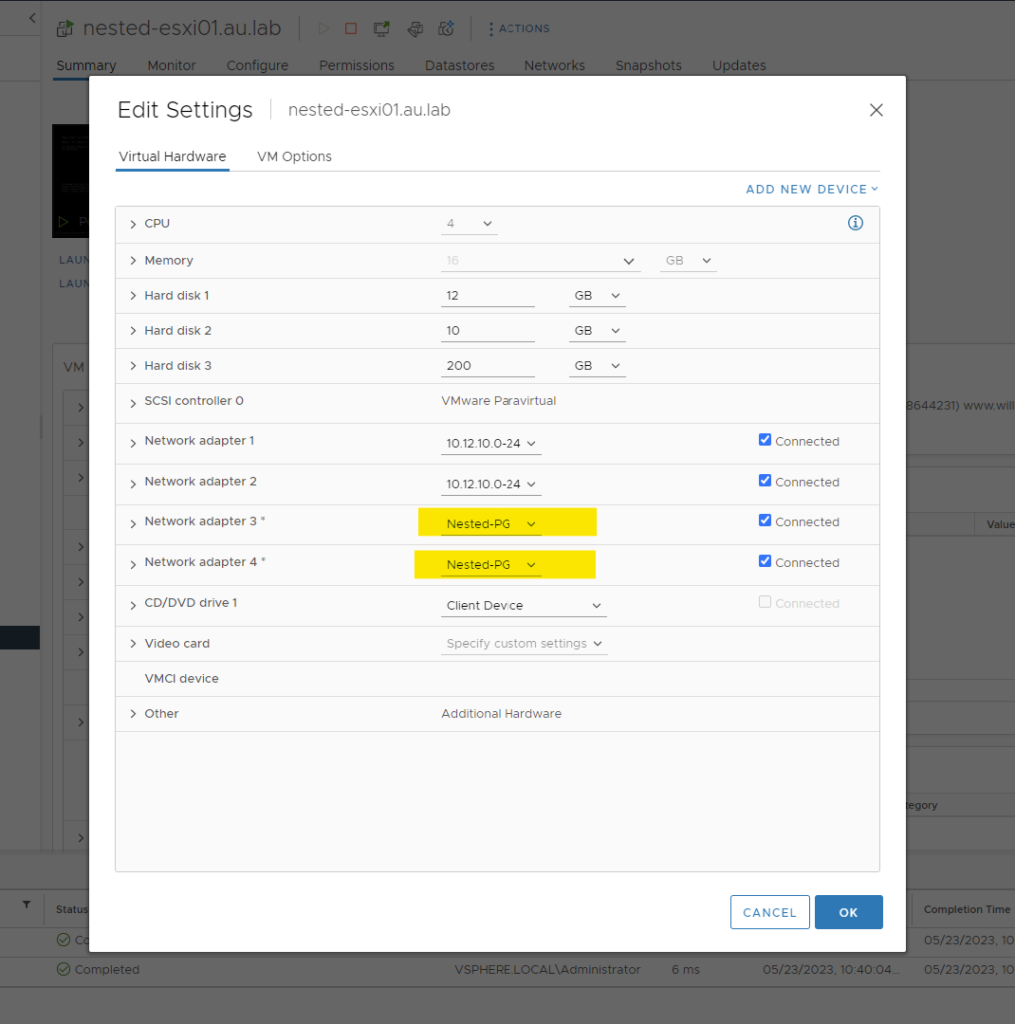
- Following this we can now go ahead and edit the nested VM’s to be apart of the new trunked port group. For each nested VM we will right click and change network adapters 3 & 4 to use the new portgroup that we just created.

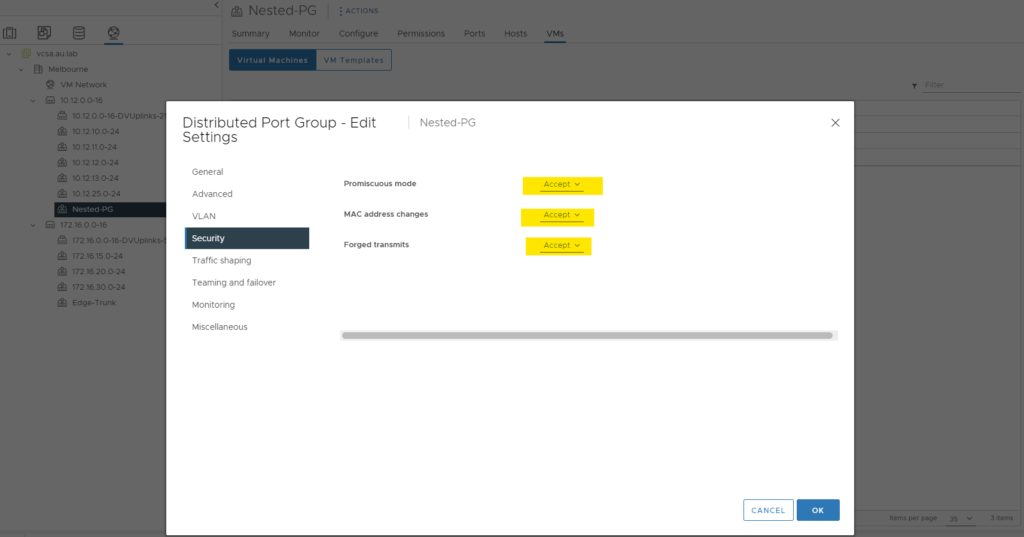
- To ensure that we also have no issues with communication between the nested VM’s we will disable any security settings on the port group to allow for promiscuous mode and MAC address changing

That’s all there is to it. We now have a fully nested resource ready to be setup with NSX-T and consumed by VIO
In the next part we will go through setting up the pre-requests for NSX-T including a basic edge gateway and a metadata proxy.