After the prior 2 parts we should now have all the basic requirements prepared in order to deploy our OpenStack instance. Throughout this part we will be deploying the VIO Manager OVA and deploy our first OpenStack Instance.
In order to follow along with this tutorial all that is required for this section is the VIO Manager OVA which can be downloaded via Customer Connect. This is just a simple OVA and is deployed in the same fashion as the NSX-T OVA.
To recap the journey so far we now have two vSphere instances spun up along with a functional NSX-T environment which we will be using for OpenStack. With that being said we are ready to go.
A refresh of the following DNS entries that we are using in this section of the guide can be seen below
VIO Records
vio-manager.au.lab
10
10.12.10.24
vio-vip-private.au.lab
10
10.12.10.25
vio-vip-public.au.lab
14
10.12.14.10
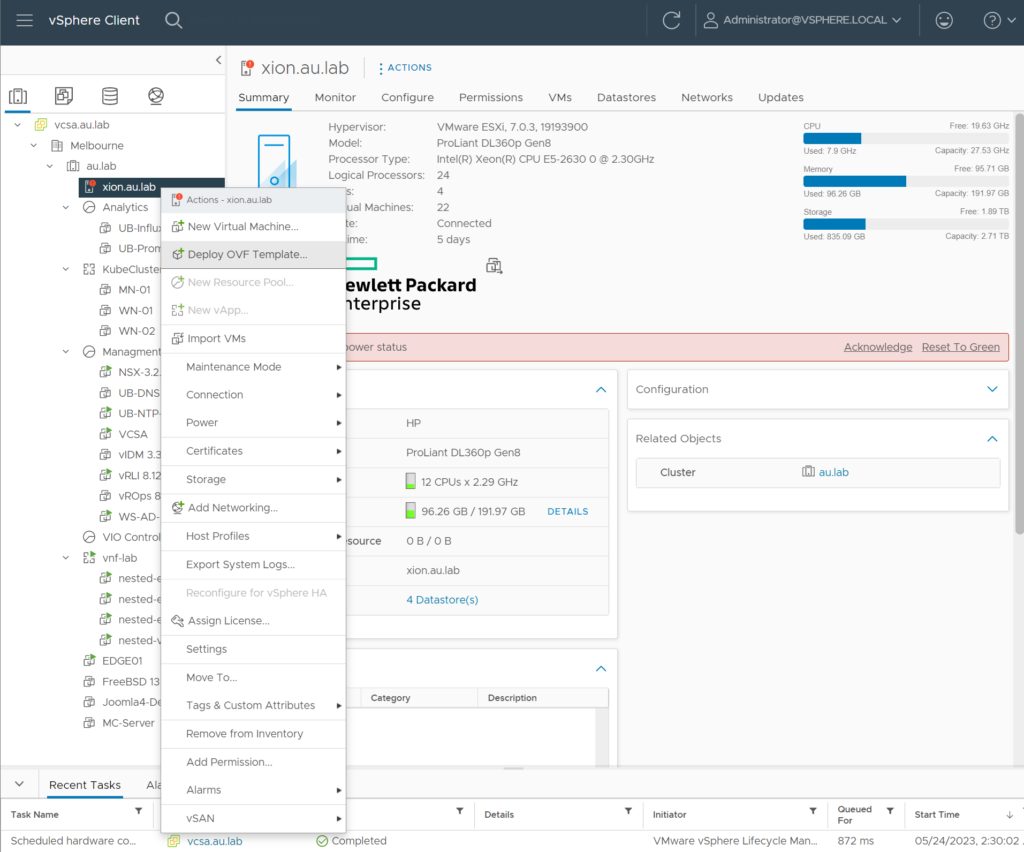
Login to the management vCenter and right click a host to deploy a template. From there we will navigate to our VIO 7.2.1 OVA and select it. Follow through the prompts to select the appropriate host and datacentre and at the networks menu (3rd screenshot) ensure that the management network is selected.
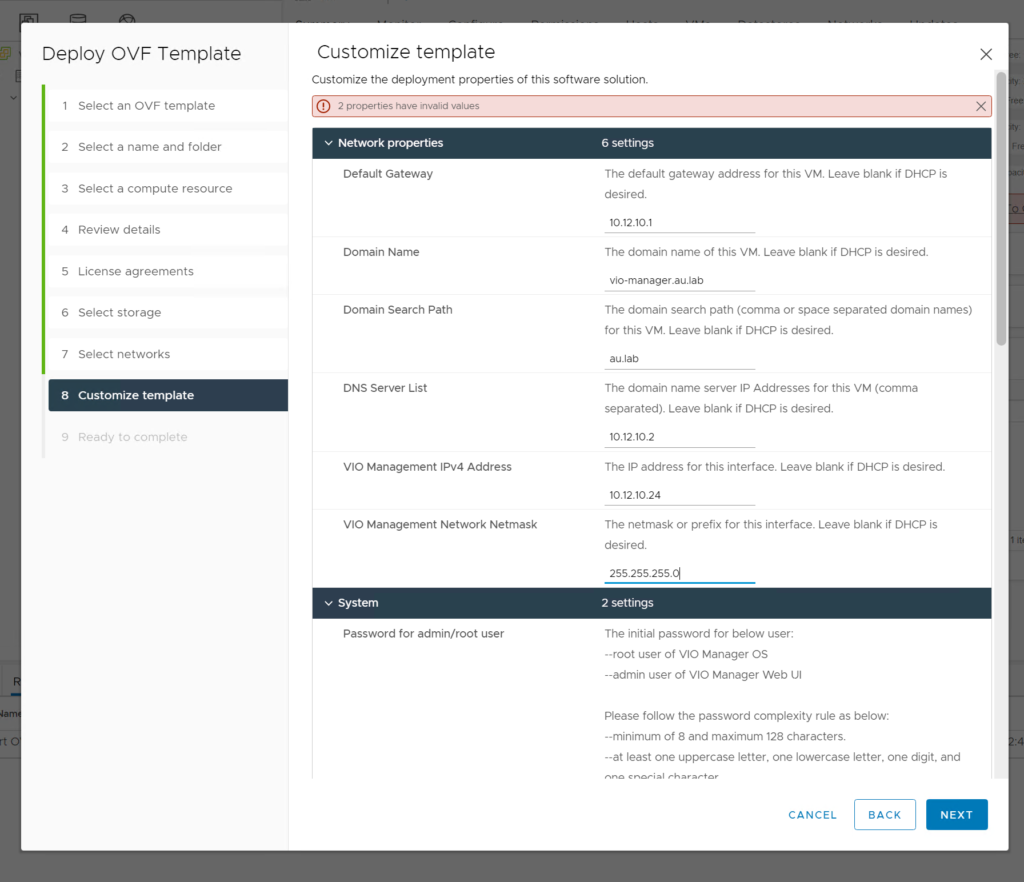
After the Management Network has been selected fill out the appropriate information for the VIO LCM deployment. As this appliance simply serves as the manger for our OpenStack all of the networking information should apply to your management network.
⚠️You will see a mention of the Control Plane Kubernetes network. Nothing will need to be change here if you are not using a .local domain for your network. In this environment we are using .au.lab so this will not require a change however if you are using an environment that is uing the .local prefix just change the Service Network Domain so something other than .local
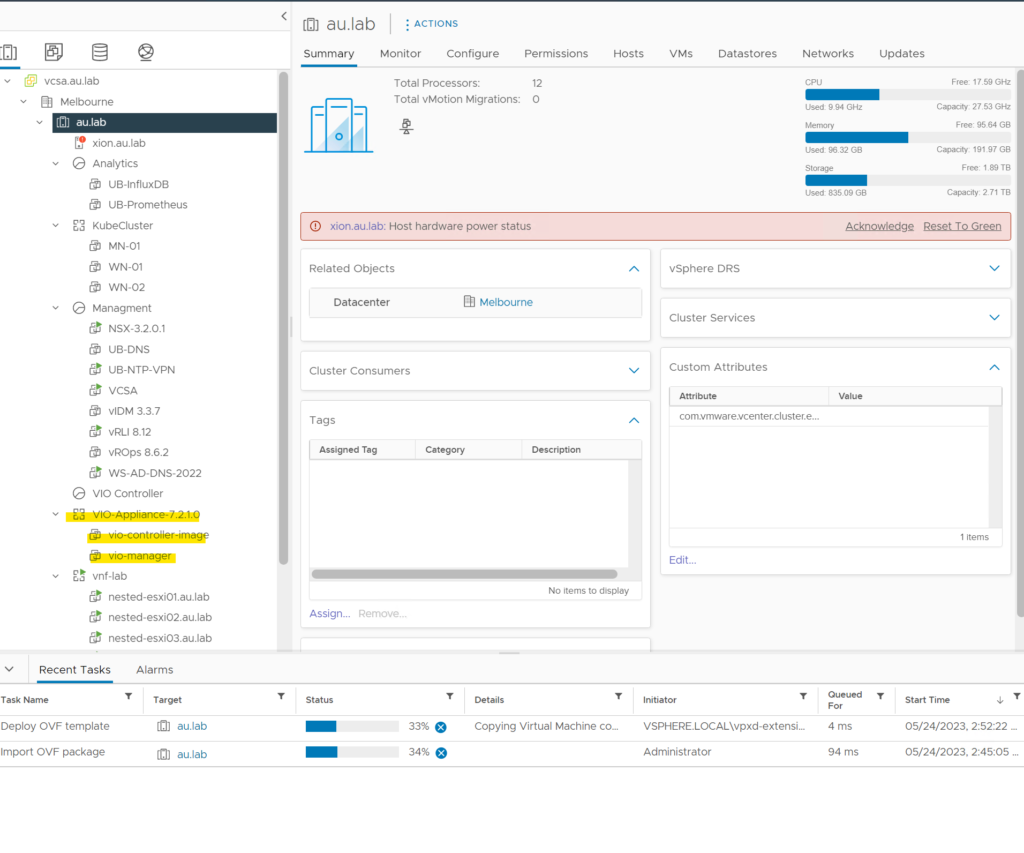
Once all of the network information is filled out select finish and the application will begin to deploy itself. You’ll notice that it creates a vApp as it gets deployed. As VIO runs of Kubernetes the controller-image will be used by the manager to deploy a new control plane. The main tool that will be of use in this vApp is simply the VIO Manager.
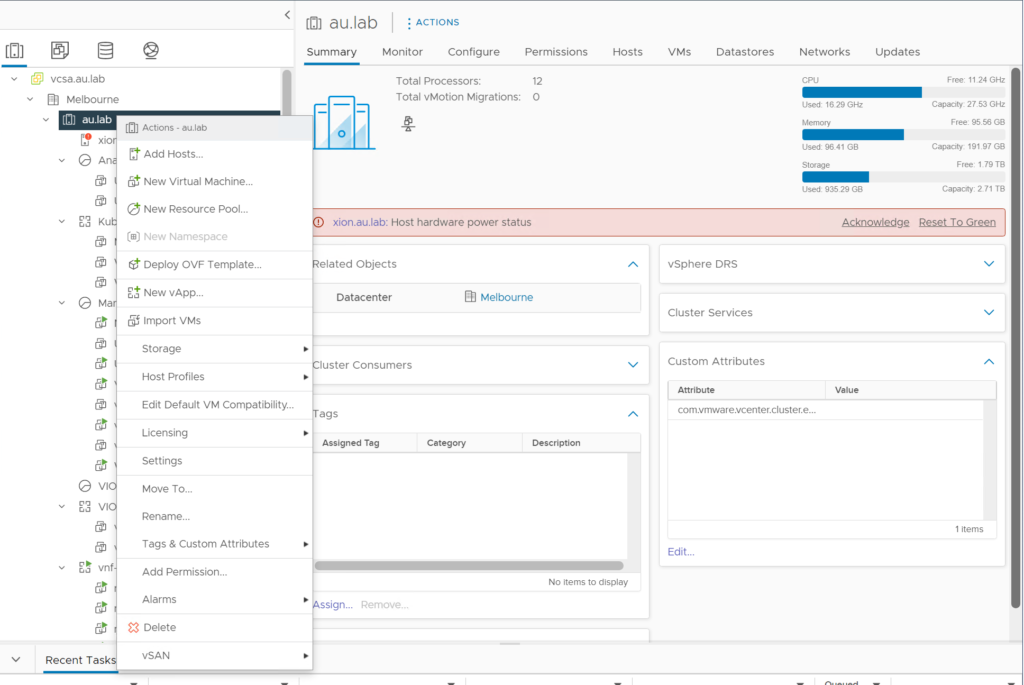
While the OVA deploys create a resource pool for your Controller Nodes. This can be done by right clicking your cluster in vCenter and simply selecting “New Resource Pool”. Give the pool a name and leave the defaults. This will be used in the OpenStack deployment as a place to put our controller nodes during the deployment.
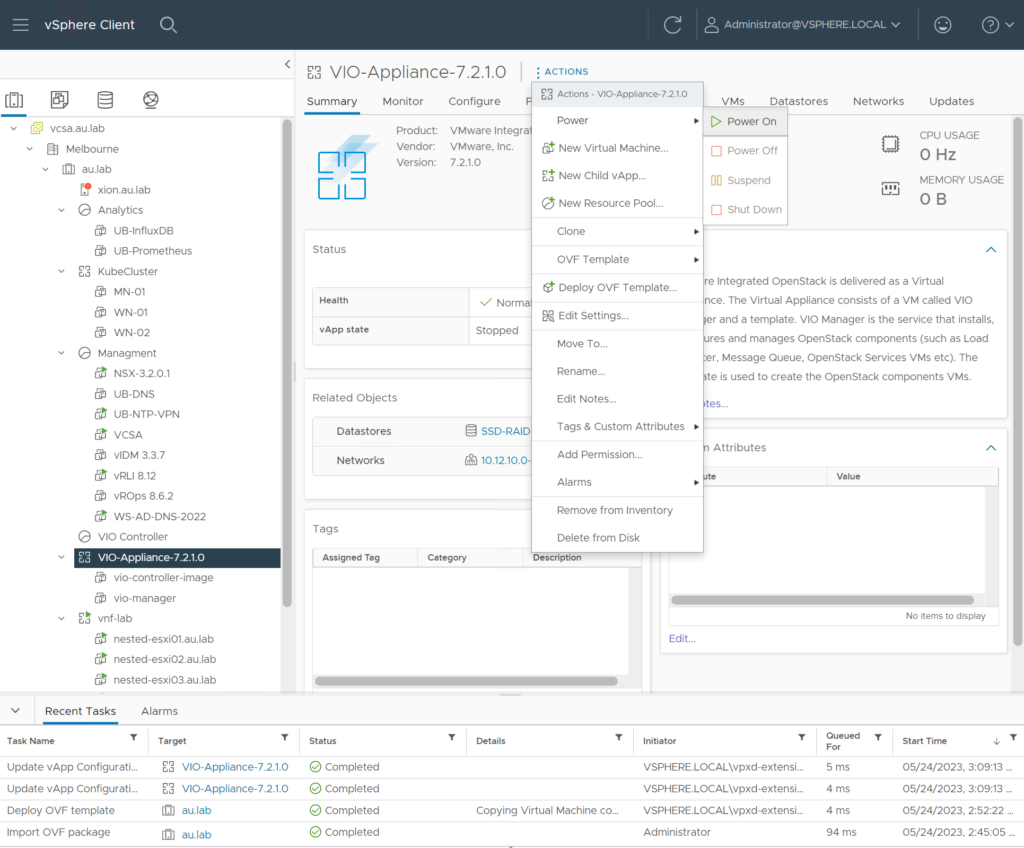
Once the OVA has finished deploying select the vApp and then select the Actions → Power → Power On. The first power on for the application may take some time. But once it is powered on we can navigate to the VIO LCM that we set during the deployment of the OVA.
⚠️You’ll notice that only the vio-manager is powered on. This is by design as the controller image will only be used once we deploy our OpenStack instance
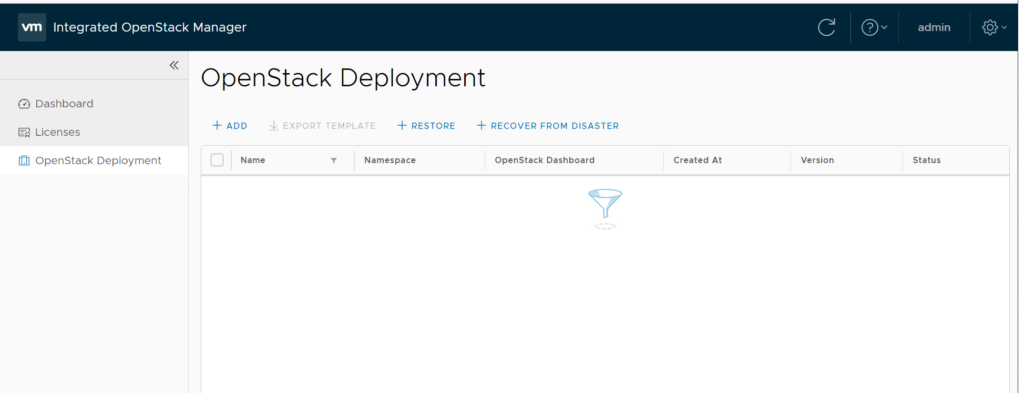
Login to the VMware Integrated OpenStack Manager with the admin account that was created during the deployment of the OVA. Once completed you will be presented with the Manger Dashboard which will look fairly empty as we have no instances deployed yet.
Navigate to the OpenStack Deployment tab and then select “Add”
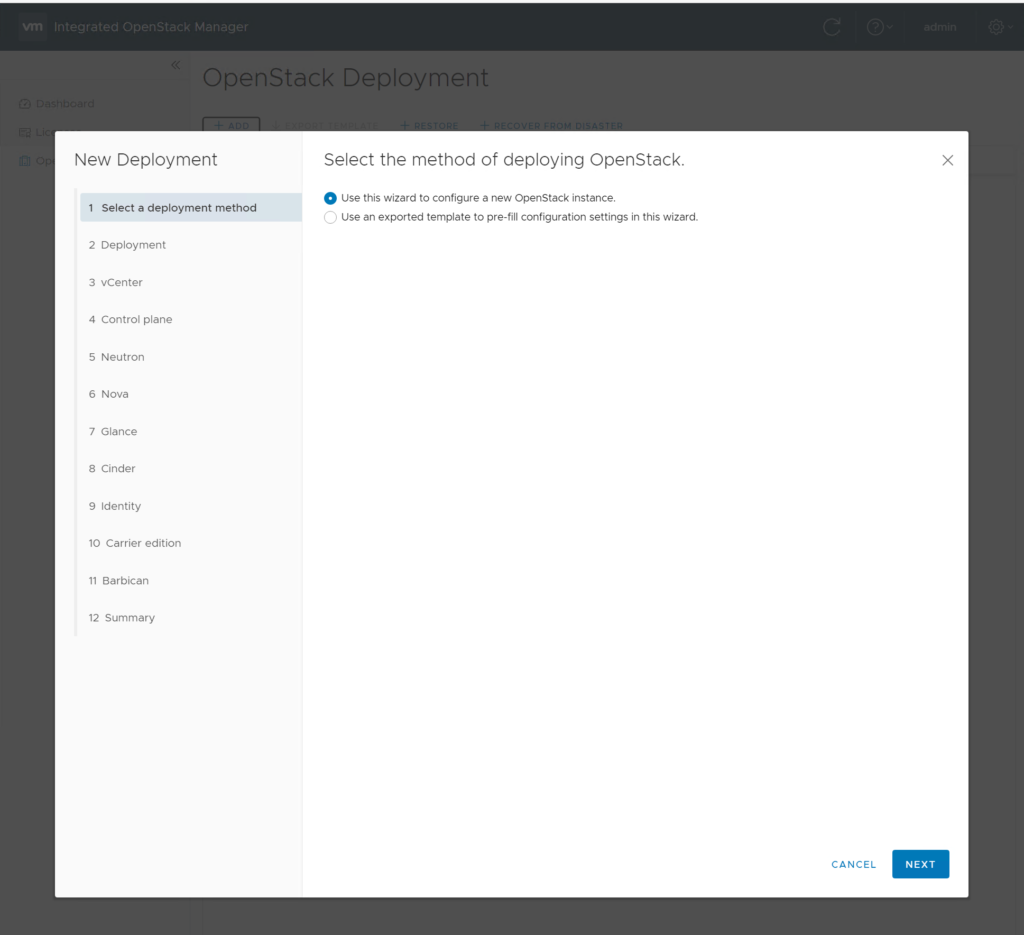
This will then open up the Deployment Wizard which will allow us to deploy OpenStack. We can also import a JSON config file if we have one available but in this instance we will just be using the wizard. Select Next to begin the deployment
Start by unchecking the High Availability deployment config. This will automatically change number of controllers to 1.
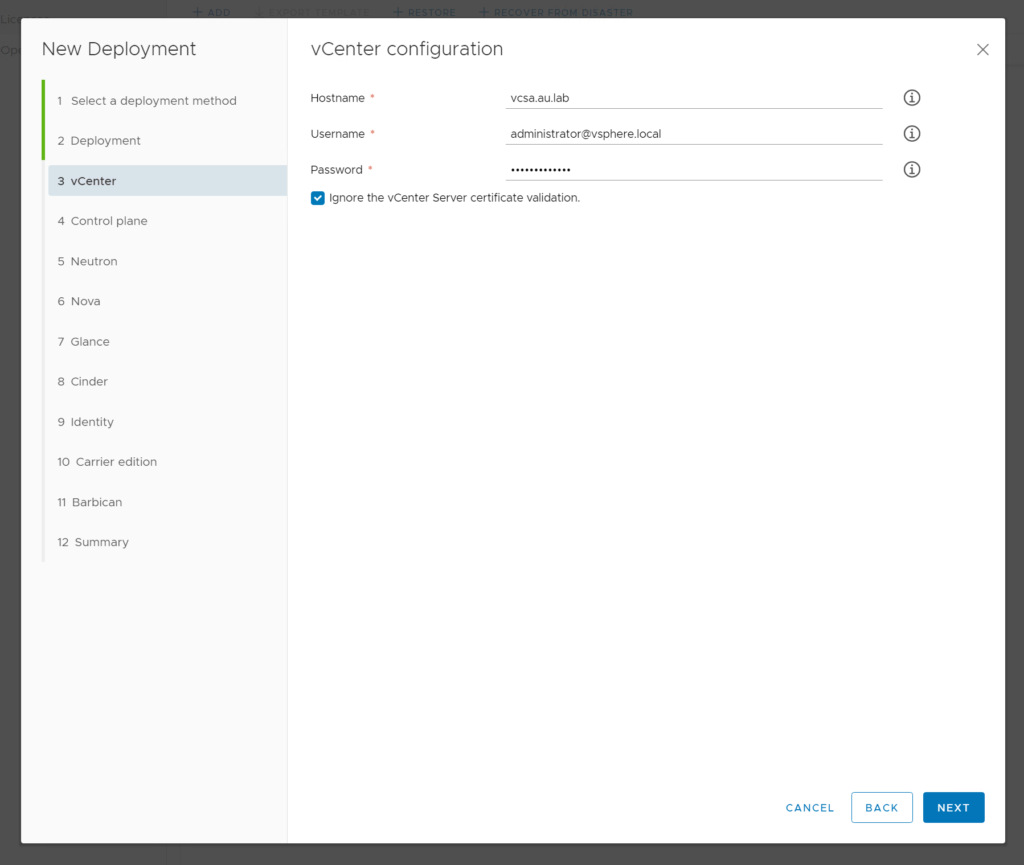
Following this we will then add our management vCenter where the controllers will live. ensure that the user that is used here has the administrator role. Selecting next will prompt the user to accept the vCenter certificate and will load in the vCenter resources.
The next screen the user is presented with is where it may look slightly intimidating. For reference ill copy the DNS names that we are using here. Essentially we can break it down into two sections which is the API and the Management Network. Everything in the Management Network should be on the same network (10.12.10.0/24 in this case) and everything in the API network should be on the same network (10.12.14.0/24)
vio-vip-private.au.lab
10
10.12.10.25
Private OpenStack Endpoint
vio-vip-public.au.lab
14
10.12.14.10
Public Hostname
⚠️The Name section is a pre-populated list of port groups which are on your management hosts. Ensure that you select the correct on for the network addresses you are using.
After the network information is selected we are then presented with where we want to create the controller plane. From here select the resource pool crated earlier and the appropriate datastores.
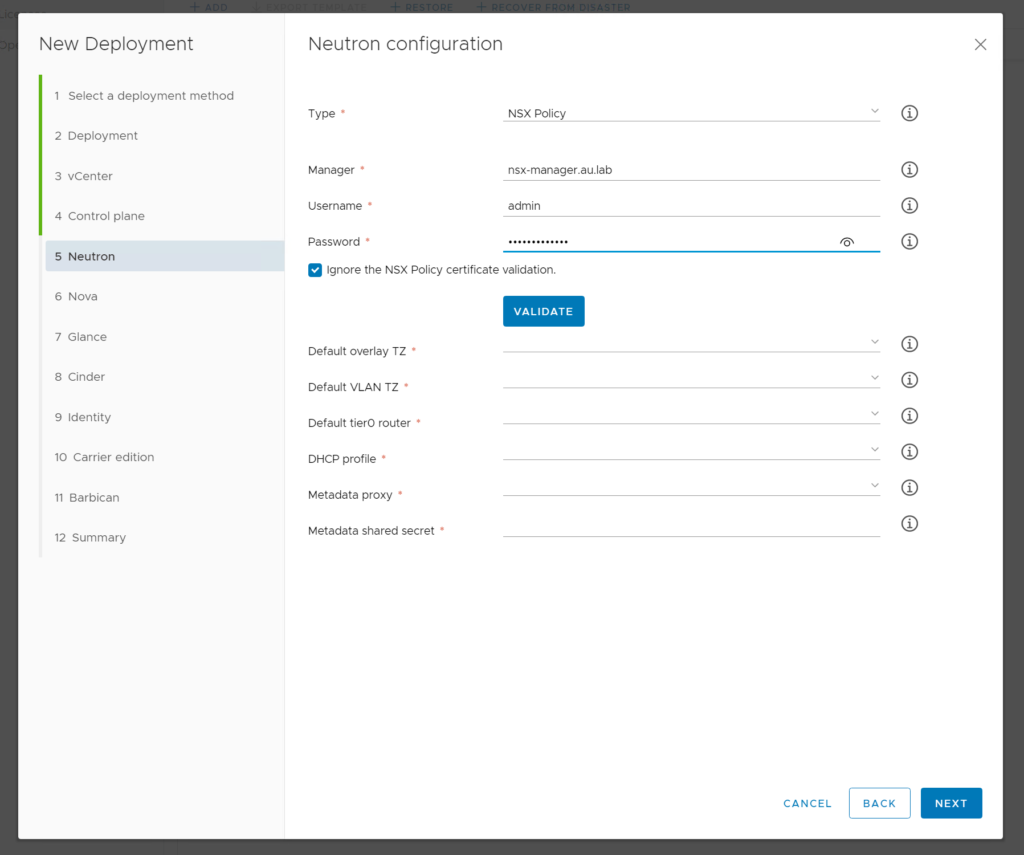
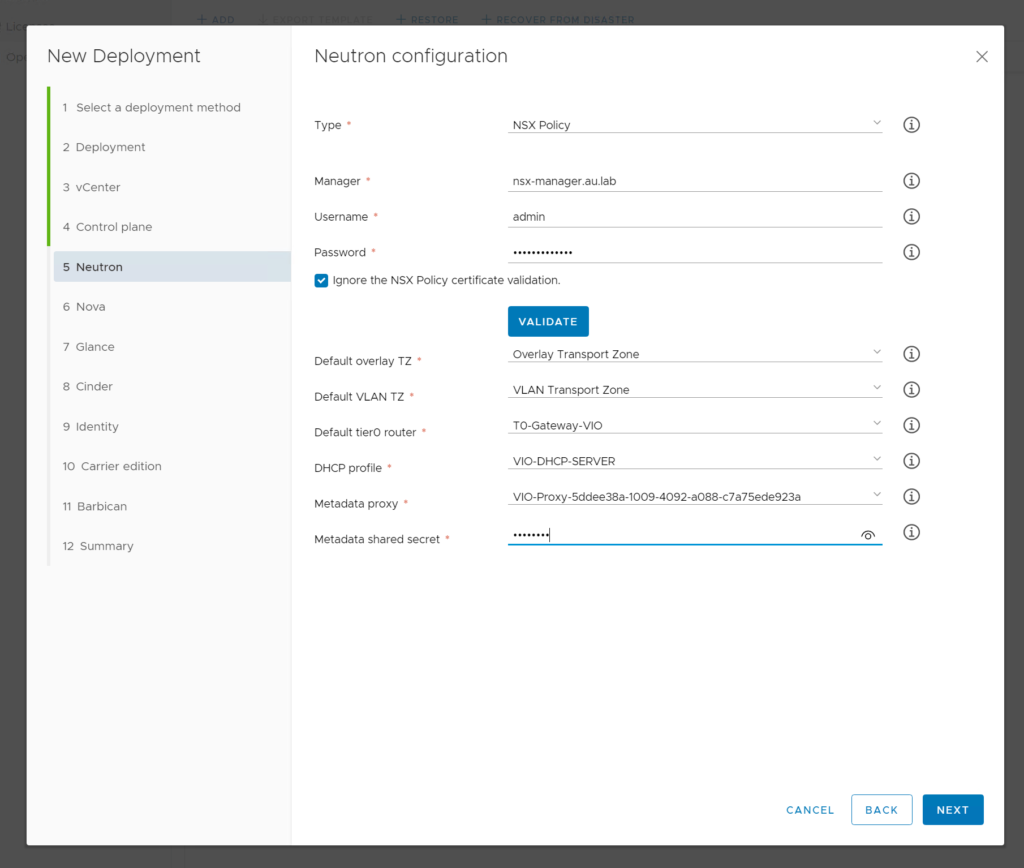
Selecting Next will then prompt the user for the NSX-T information. Enter the admin account and select validate to populate the values below. Following this select each dropdown and select the objects that were created in Part 2 along with the metadata proxy password
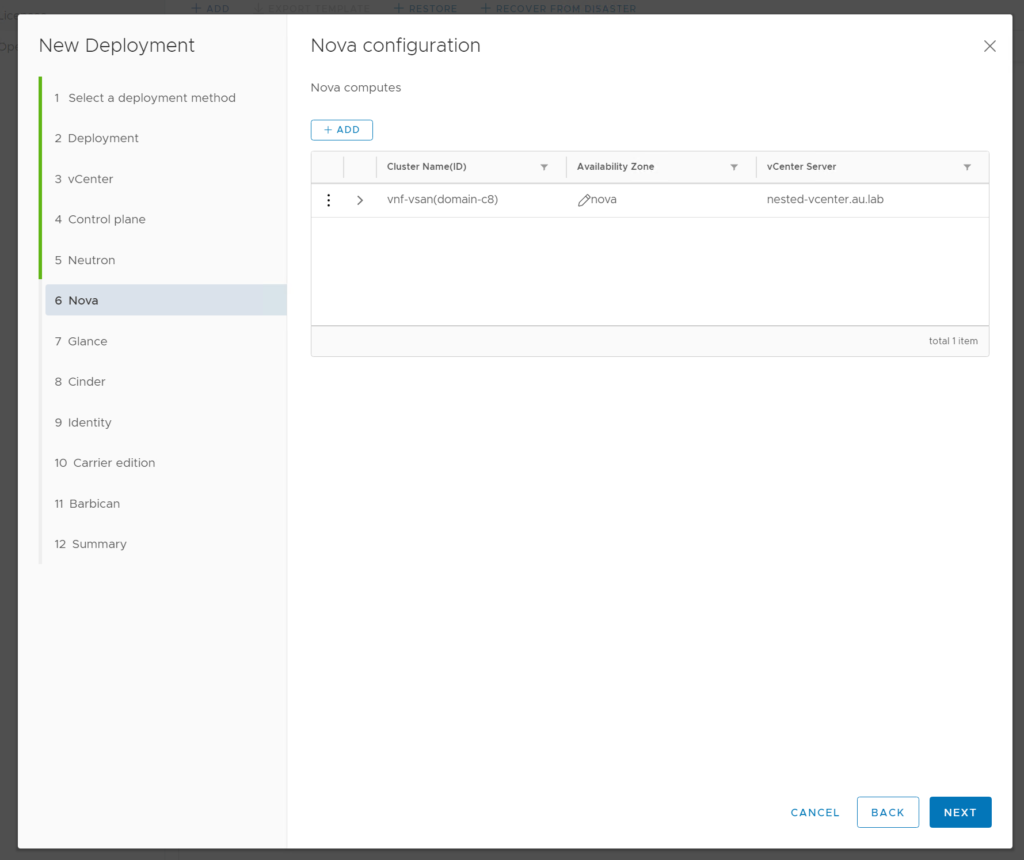
Selecting Next will then prompt the user for the Nova Resource pool. We can select add here and add our nested ESXi vCenter.
Once added you will be able to select it from the drop down and select the vSAN datastore
Selecting next will then prompt the user for a glance config. Simply click add and select the vSAN datastore and click next.
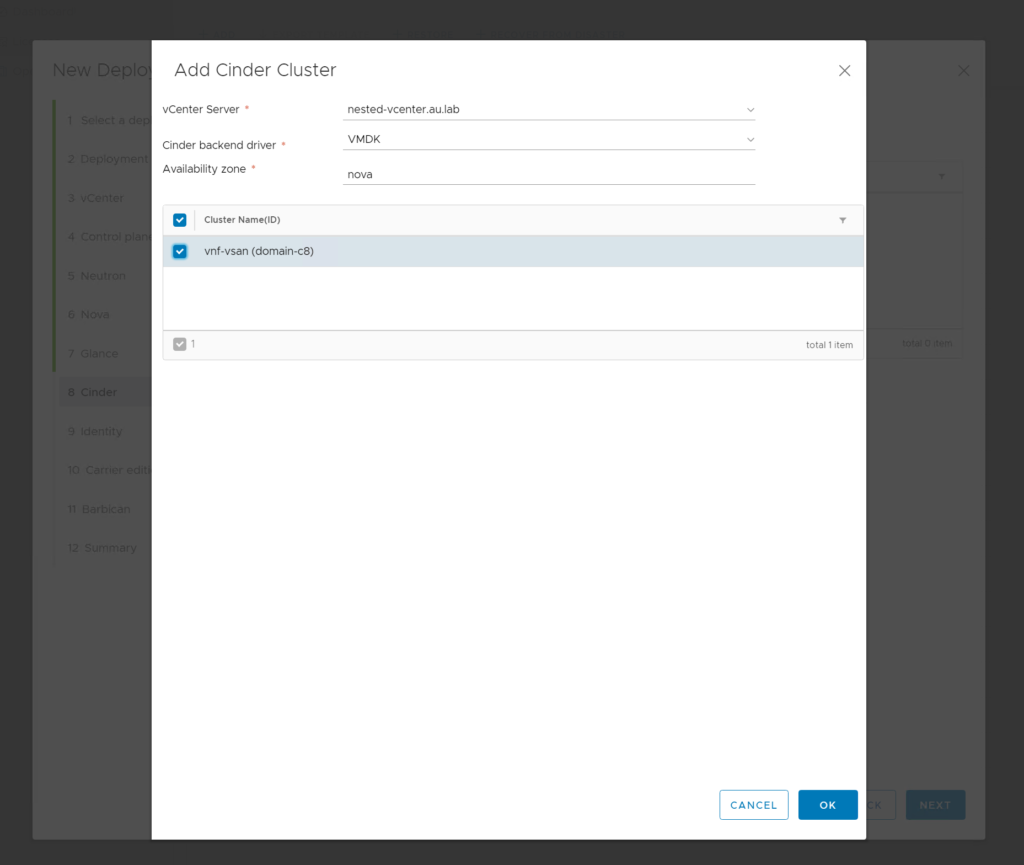
Repeat the same process for Cinder by selecting add followed by the vSAN cluster in the nested vSphere instance.
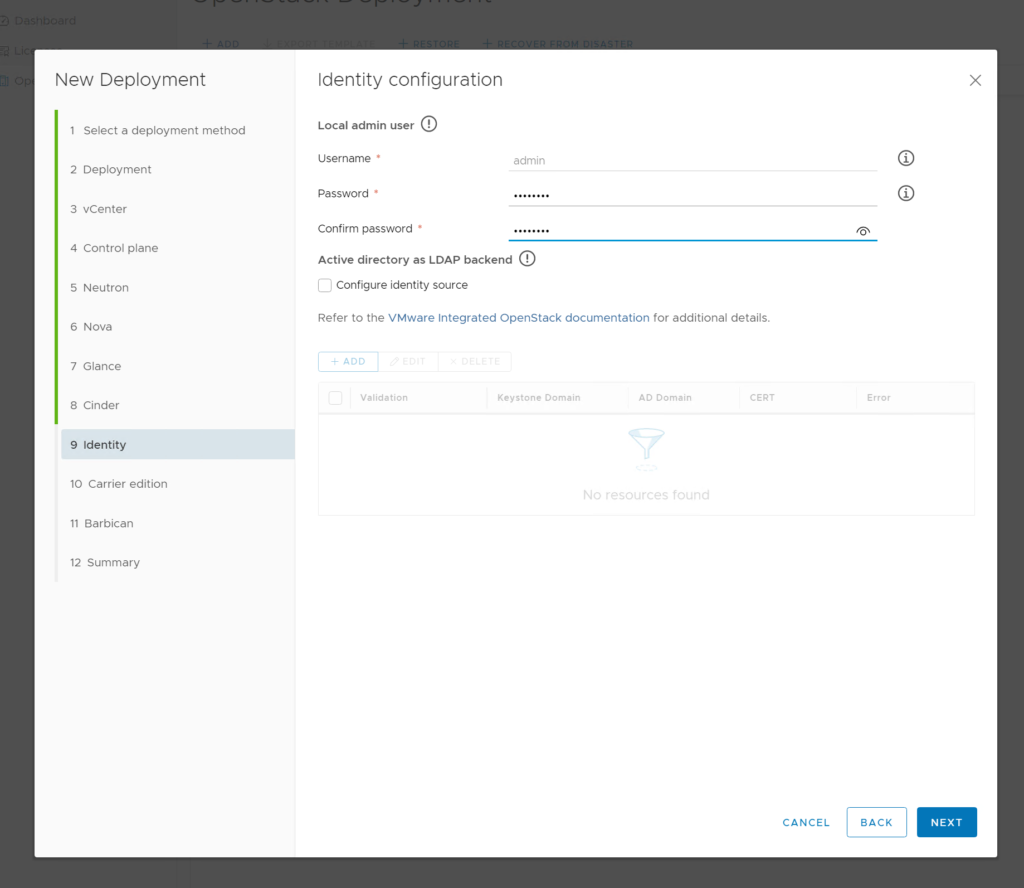
Within the identity screen enter a local admin password which will be used to login to the OpenStack default domain.
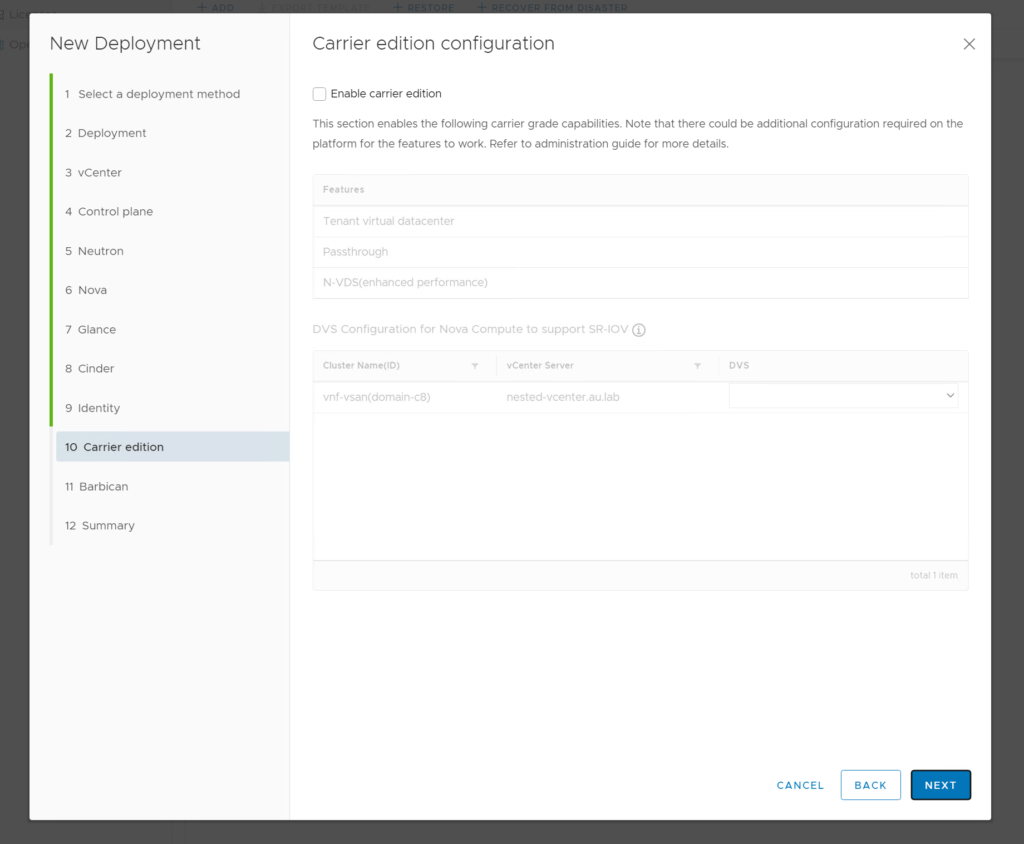
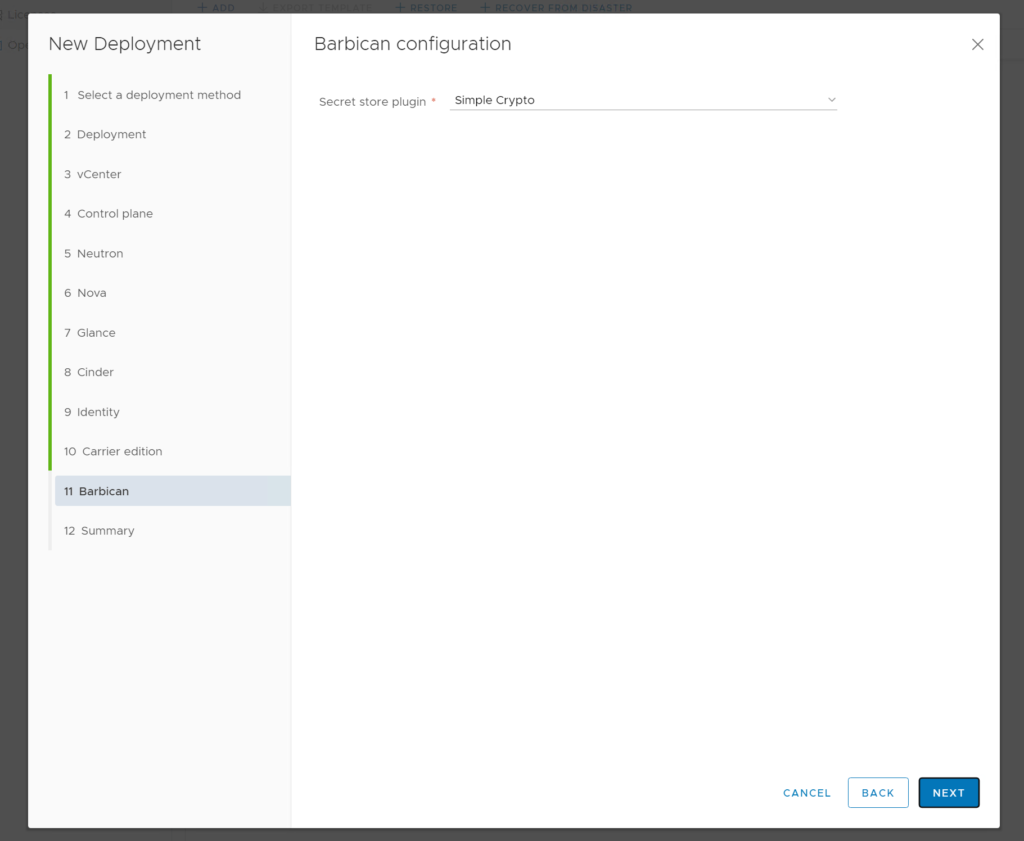
Carrier edition will be disabled for this instance and Barbican can also just use the defaults for this deployment.
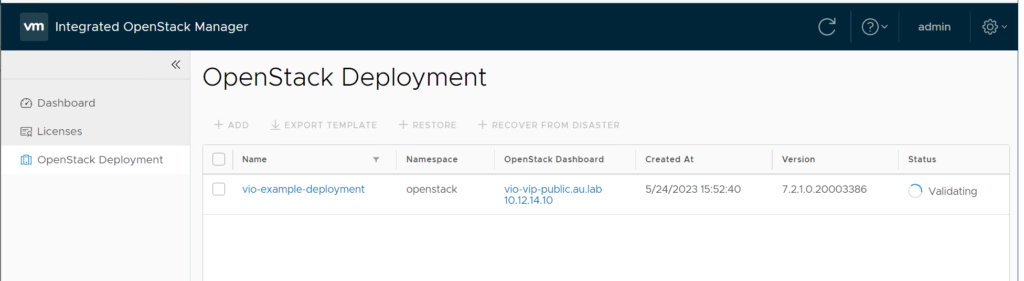
Finally you will be presented with your final configuration on the summery screen. For reference it’s good practice to export the template so if you need to redeploy you can simply import the template again rather than completing the Wizard again. Once you have exported the template select finish and the wizard will begin to deploy OpenStack.
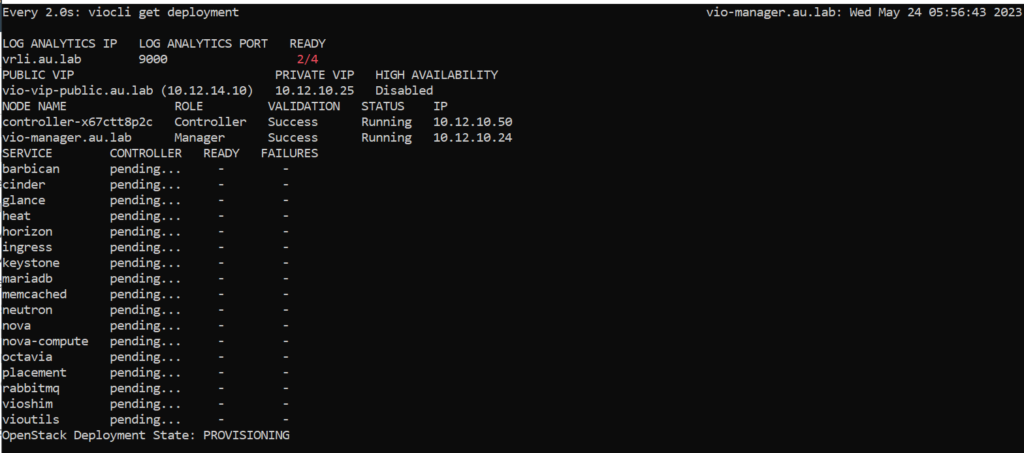
To monitor the configuration we can SSH into the Integrated OpenStack Manager through the root account and issue the watch viocli get deployment which will show the status of each of the services and if there are any issues with them booting up.
Monitor the console window until the OpenStack Deployment State switches to running
⚠️You can also monitor this through the OpenStack GUI but its far less detailed. It may take up to 30mins-1hr to deploy an OpenStack instance on a nested environment so be sure to give it some time.
If you notice that any of the services are stalling or not loading up there could be an issue in the configuration. If this is the case simply head back to the OpenStack Manager GUI then navigate to manage and change any configuration that may be at fault.
Common faults include Neutron (NSX Configuration) and Nova (vCenter Configuration)
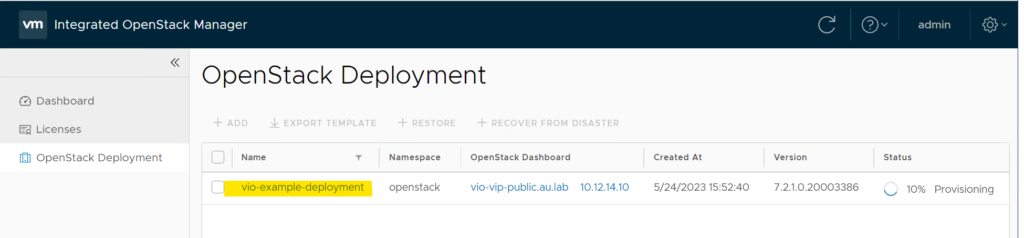
Once complete you will be presented with the following deployment screen. Notice at the bottom of the console window we can see the service as running.
Navigating back to the LCM we can also see that the status is running within the GUI as well. Now we can click the OpenStack Dashboard Link and we will be presented with our brand new OpenStack Instance.
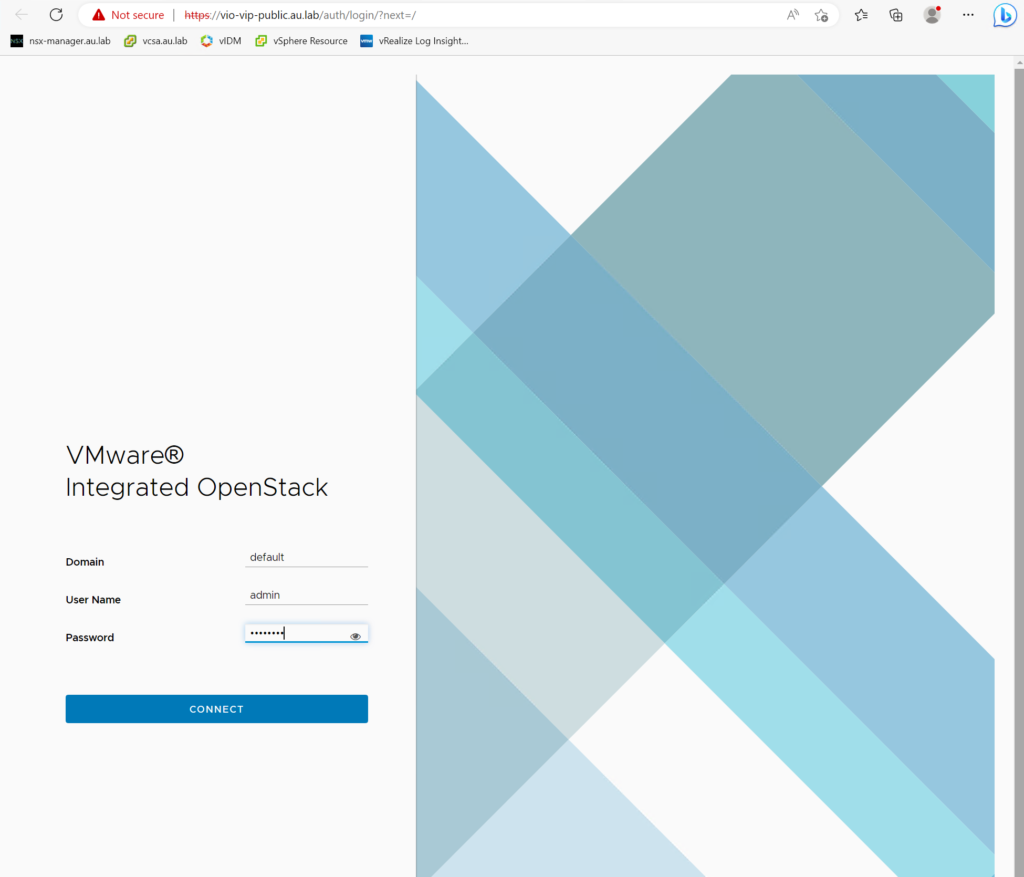
Using the admin credentials that were defined in the OpenStack deployment along with the default domain allows us to log into the OpenStack Instance.
That’s it we now have a fully functional VMware Integrated OpenStack environment to play around in. From here we can create instances, networks and heat templates for automatic deployments.
Stay tunned for the next part where we go through creating an external NSX-T network and connect and instance to it.
As a VMware consultant we are always running into new and exciting challenges as we face the most cutting edge use cases and scenarios. Within TopVCF i'll be looking to document and de mystify and of the challenges or questions iv faced to hopefully help out the wider community.